Submissions
1. Overview
1.1 Introduction
This section explains the end-to-end component submission workflow for Financial Institution (FI) users within the Developer Console.
The Developer Console provides a structured and secure platform that enables FI users to:
- Create and manage their own dedicated private GitHub repository.
- Submit components (Aspects, Widgets, and Features).
- Track the complete lifecycle of submissions, including validation, review, and deployment.
- Conduct engineering and security team review through GitHub Pull Request (PR) workflows.
- Deploy published components to the Experience Group for the target environment.
- Manage collaborators and access controls securely.
2. Login and Default Admin Setup
2.1 New FI – Admin Behavior
When a new FI is onboarded:
- A default Admin user is created by the Candescent onboarding team.
- Only users with Admin and Developer roles can access the Submissions tab.
- Spectators cannot view or access the Submissions tab.
3. First-Time Setup – Build Component (New FI Only)
3.1 Build Component
To build a new component, follow these steps:
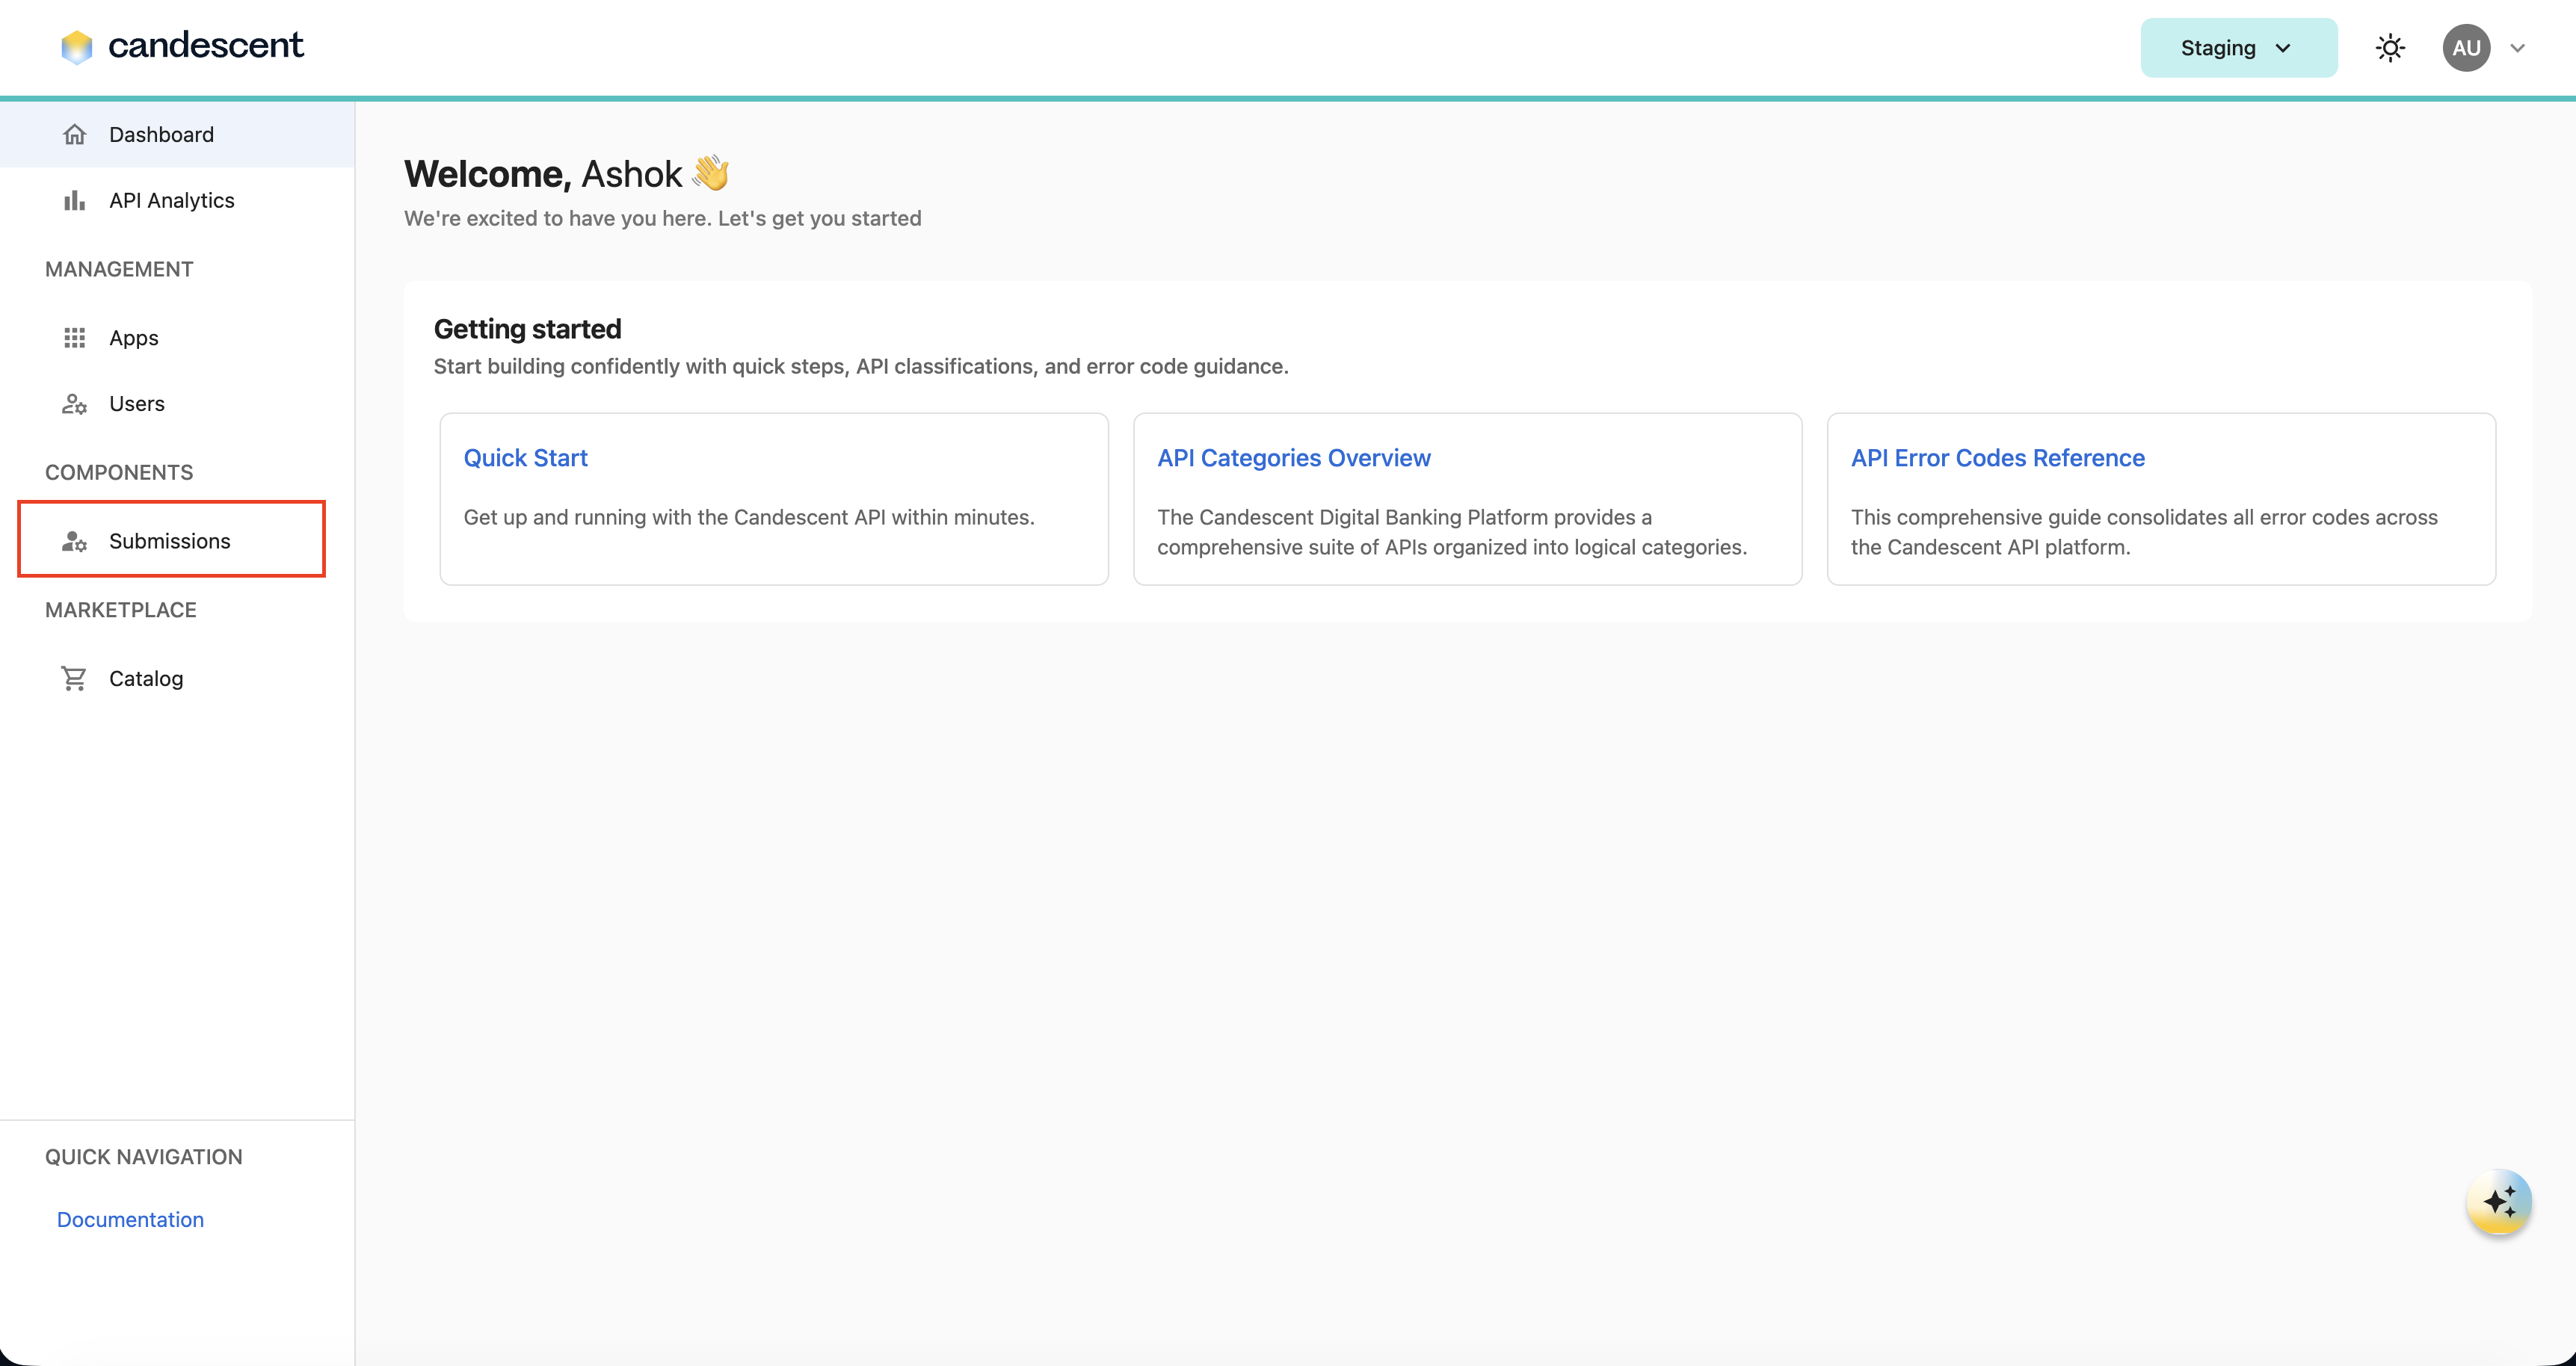
- Click the Submissions tab in the left navigation pane.
- Click Build Component.
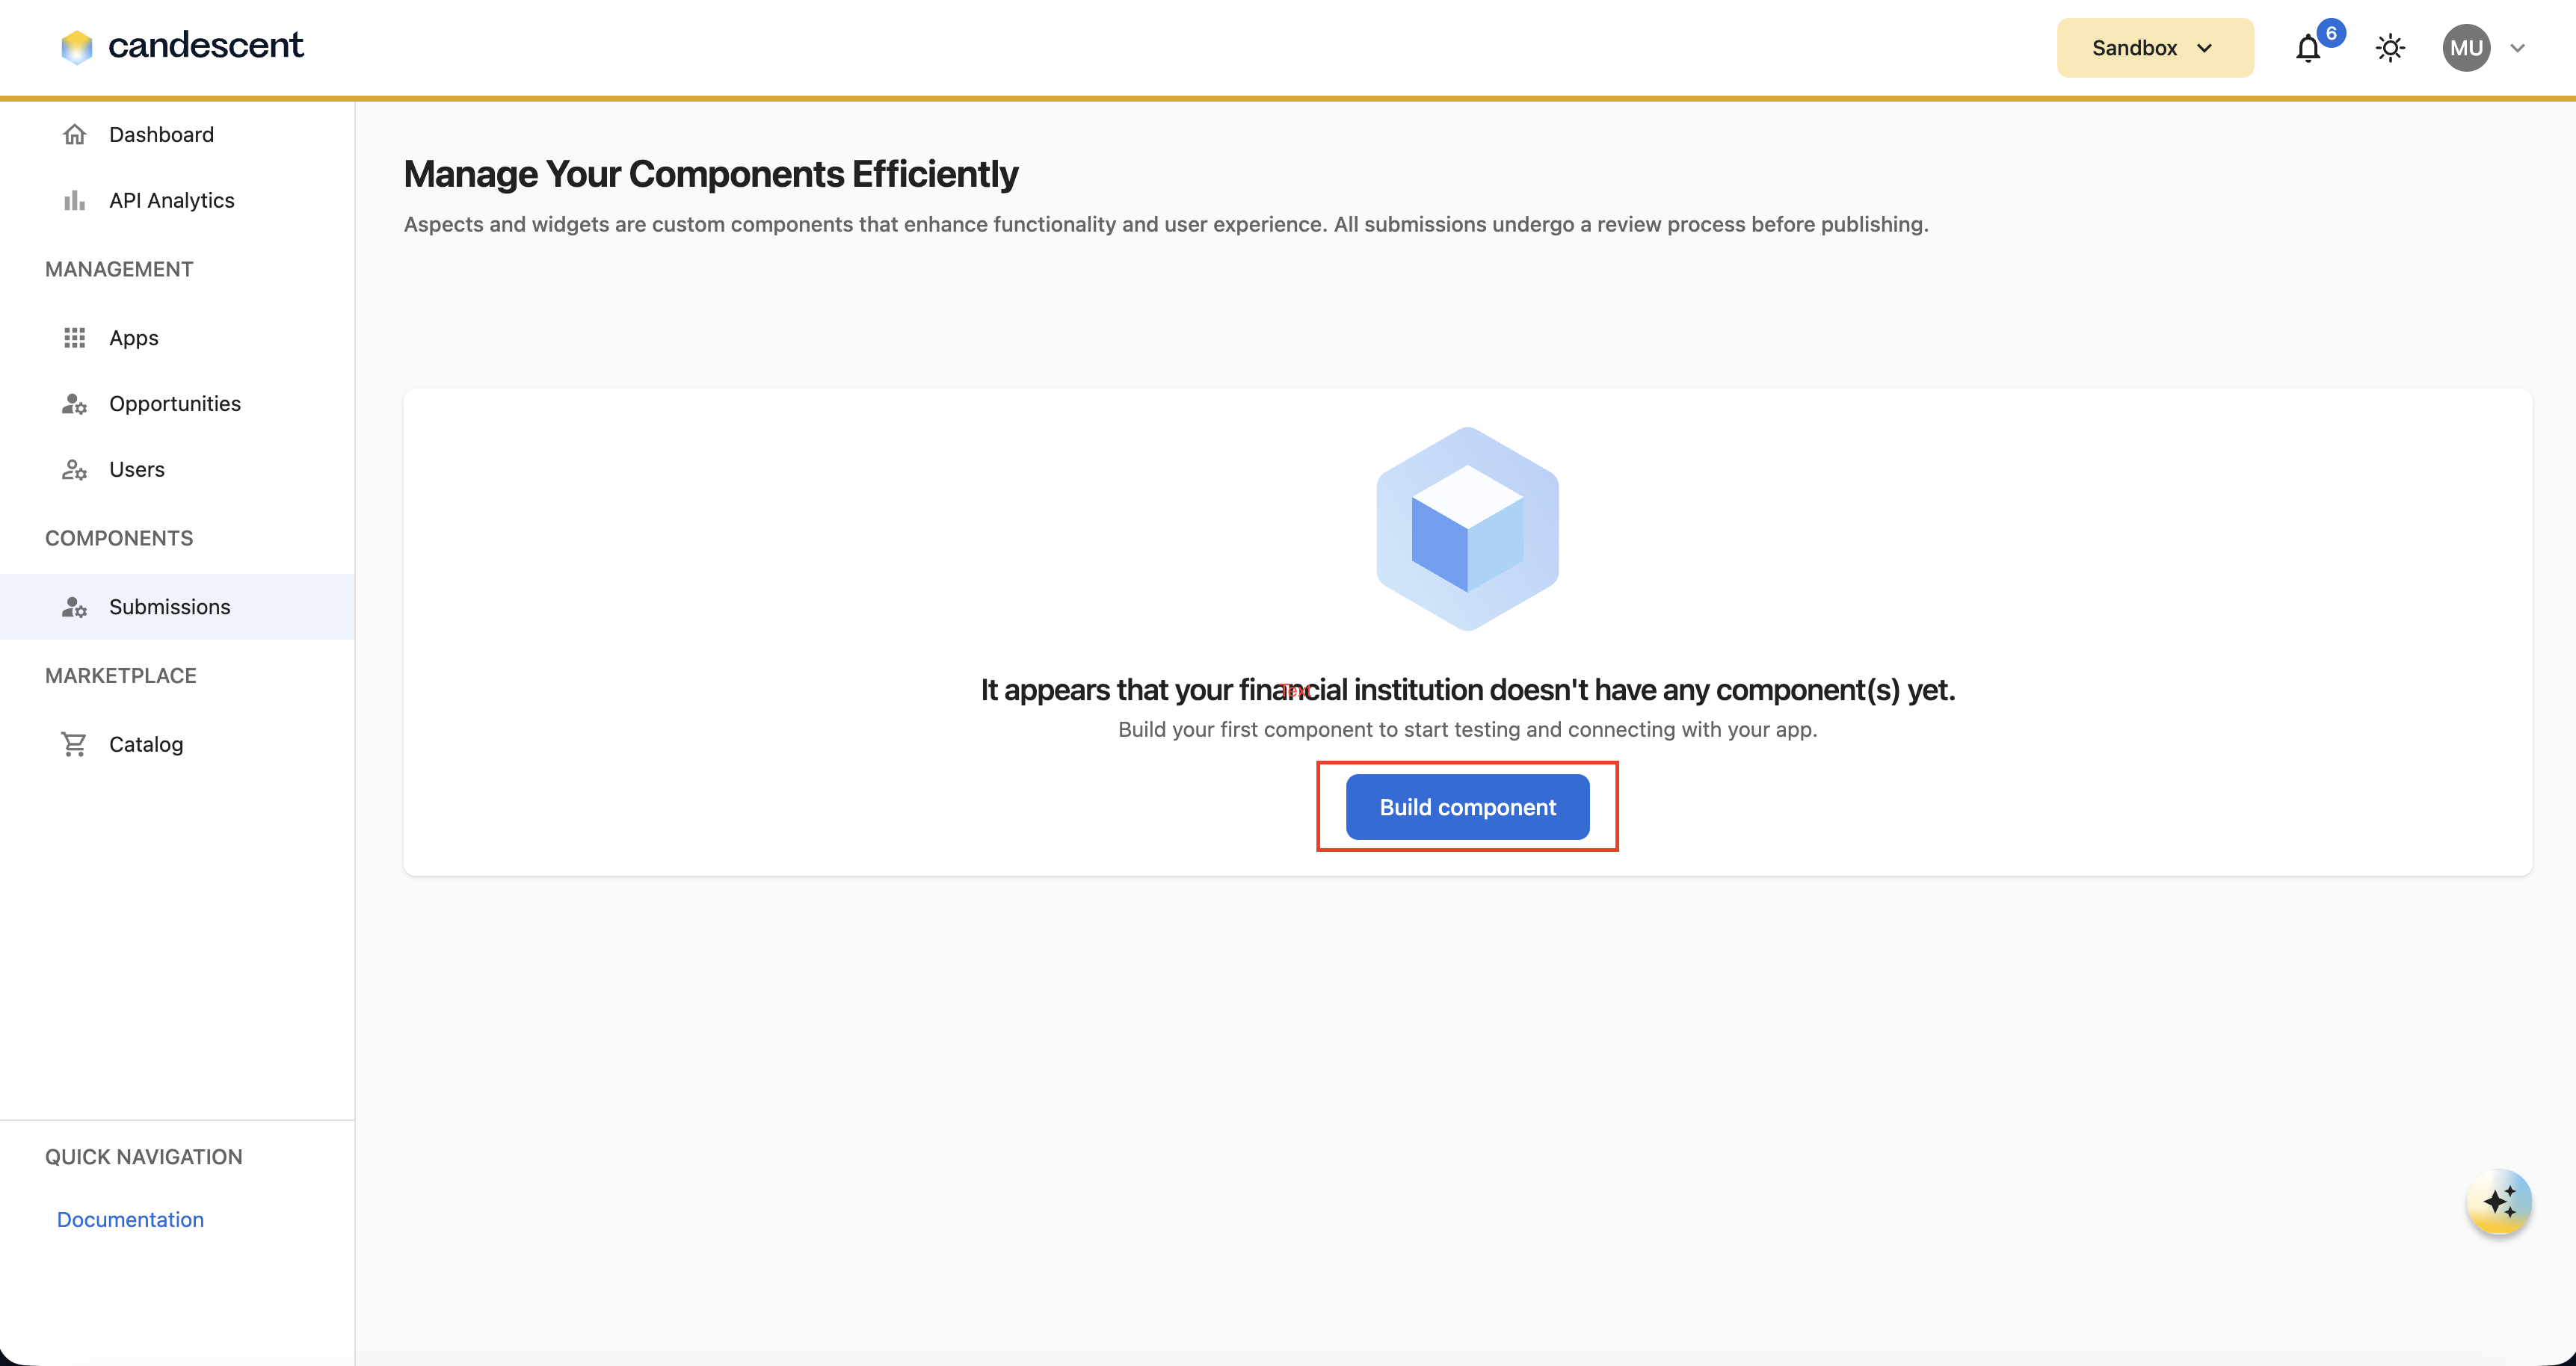
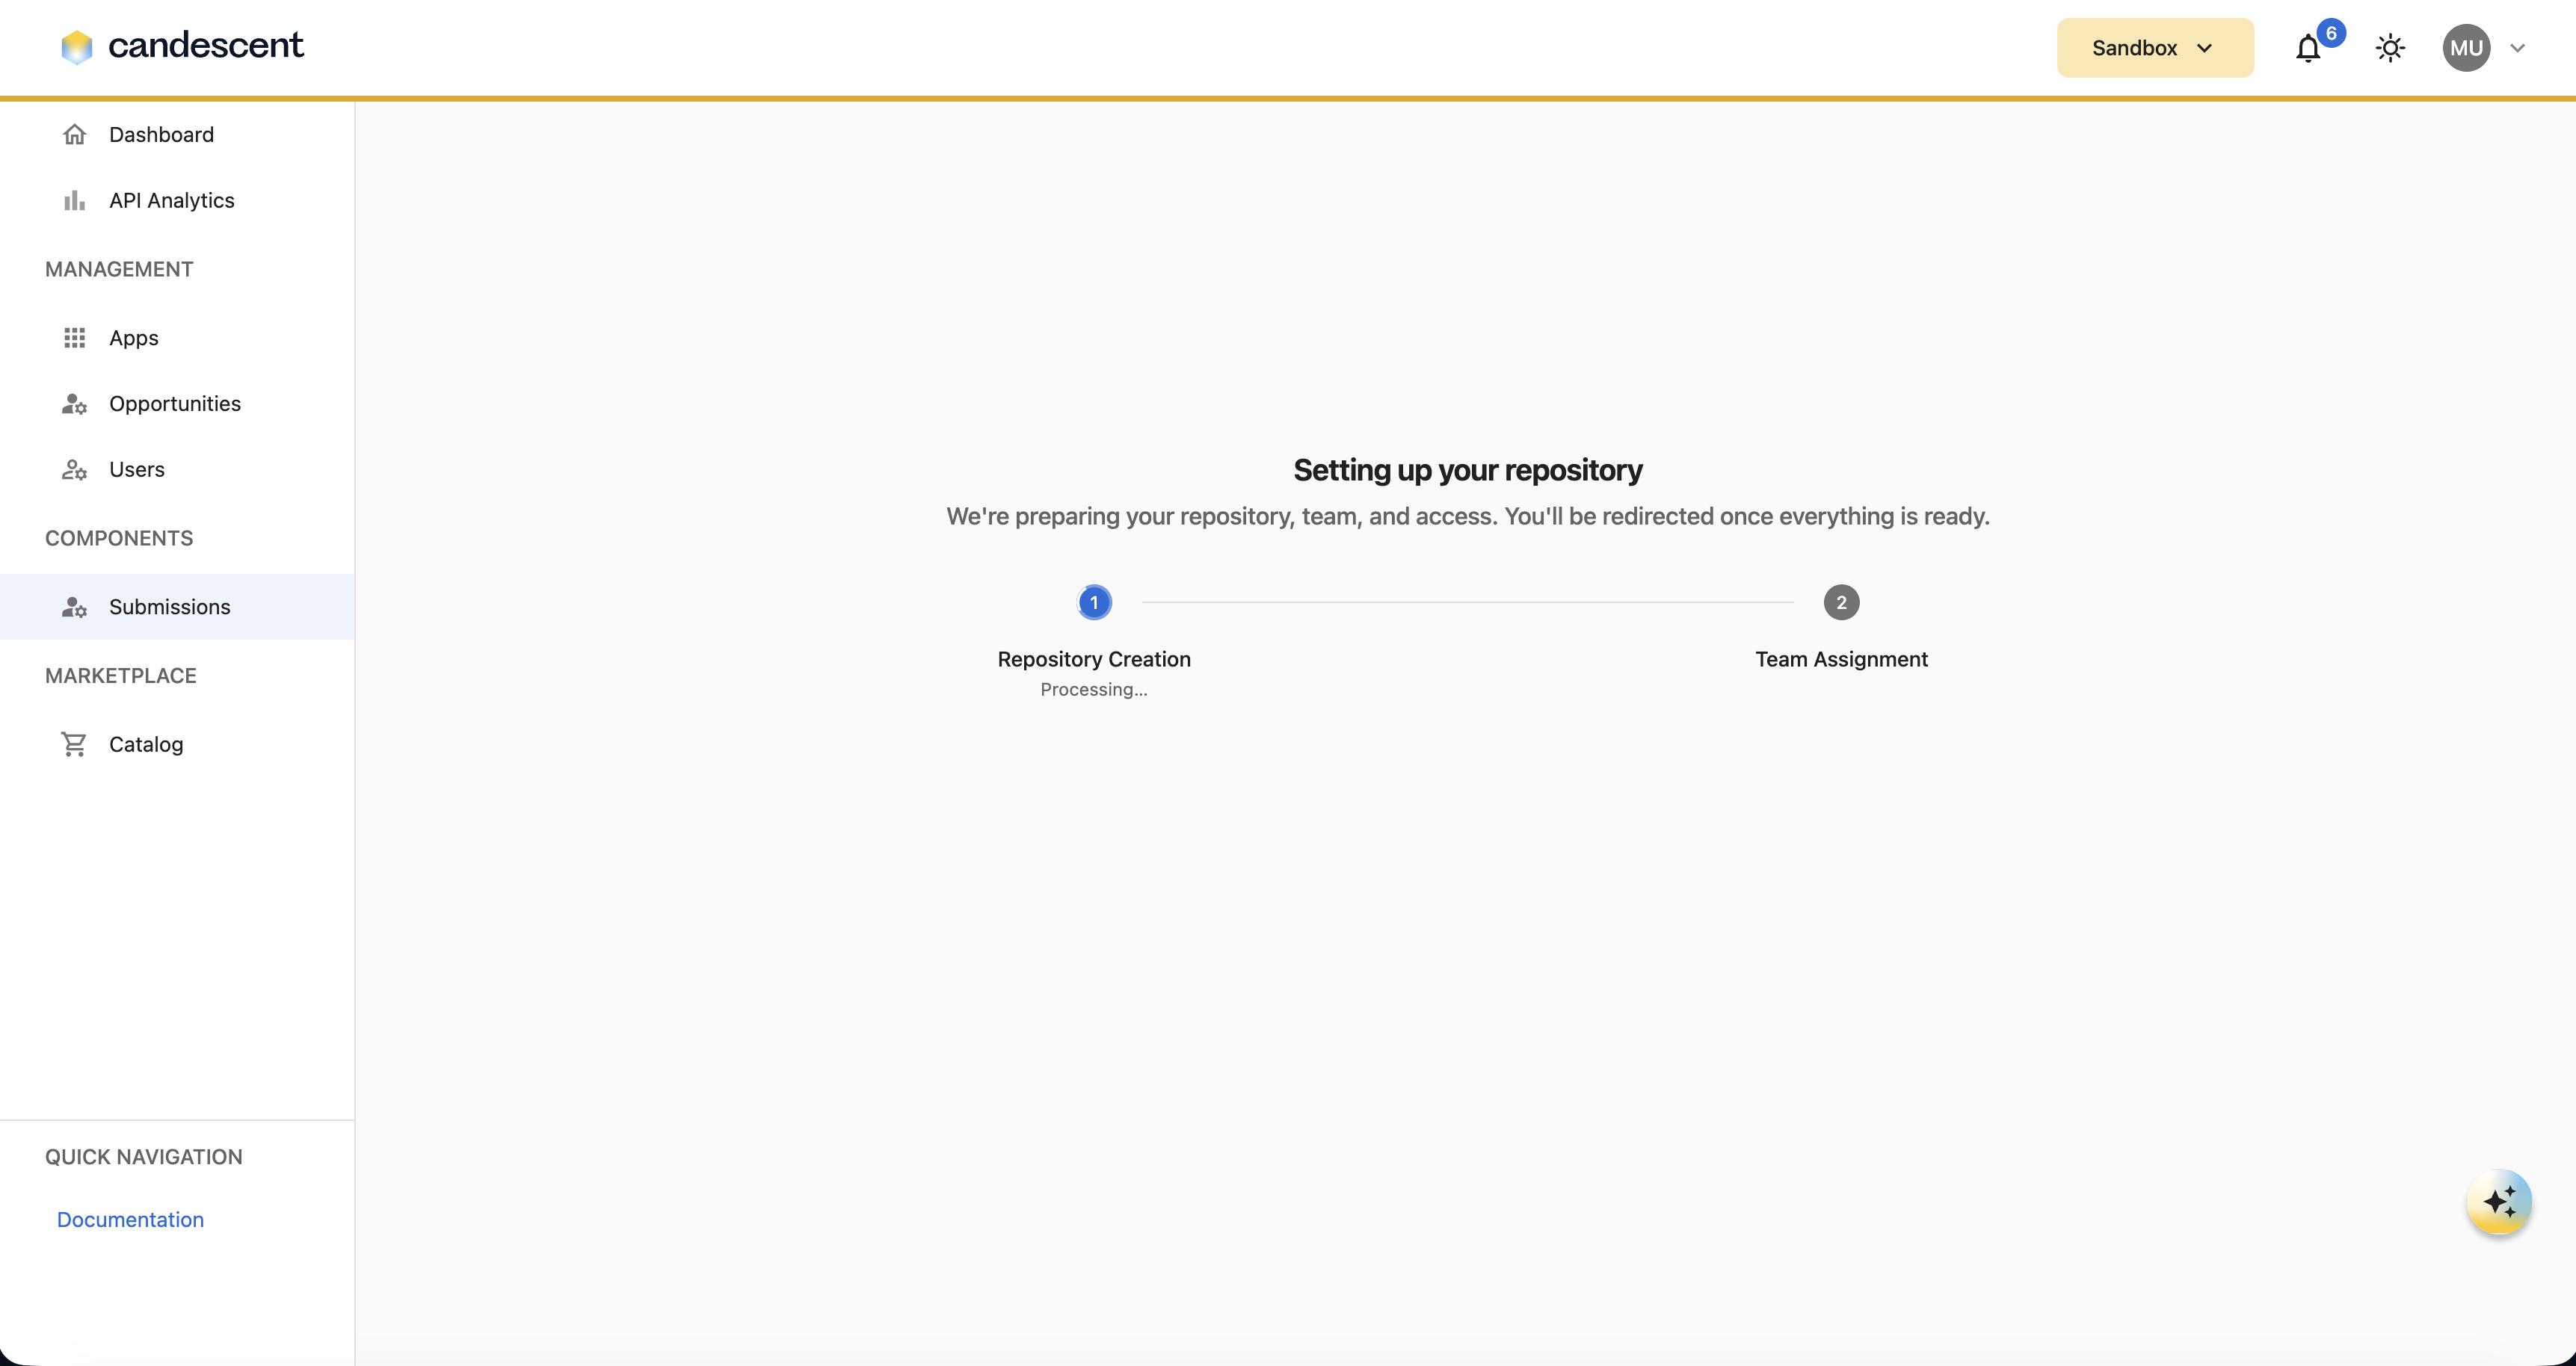
When you click Build Component:
- Repository creation, team setup, and user assignment to the team are completed in the background.
- You receive an email with an Accept Invitation link for the GitHub repository.
- Access is granted after you accept the invitation.
4. Submission Capabilities
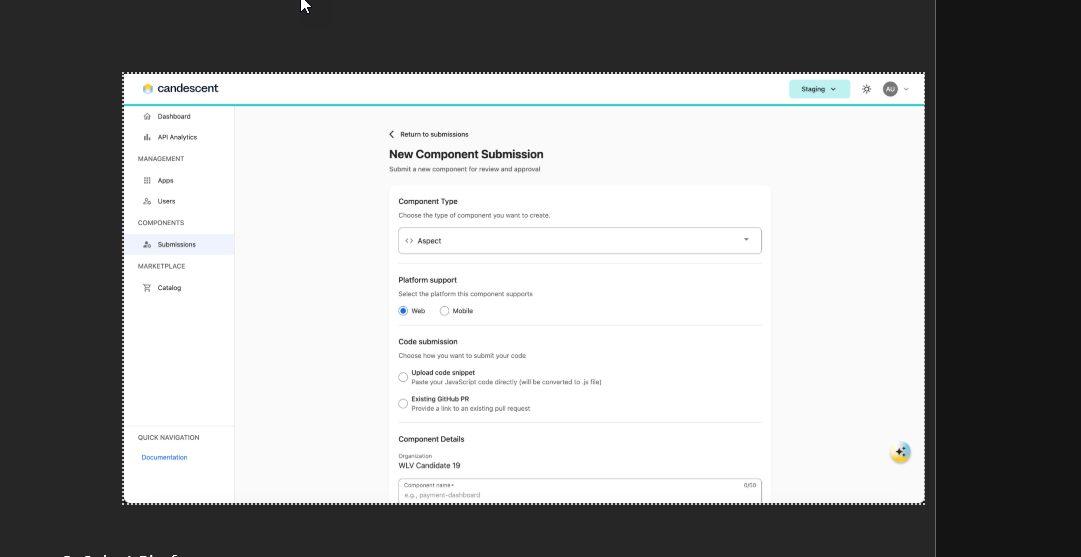
After you click Build Component, you are redirected to the Submission Information form.
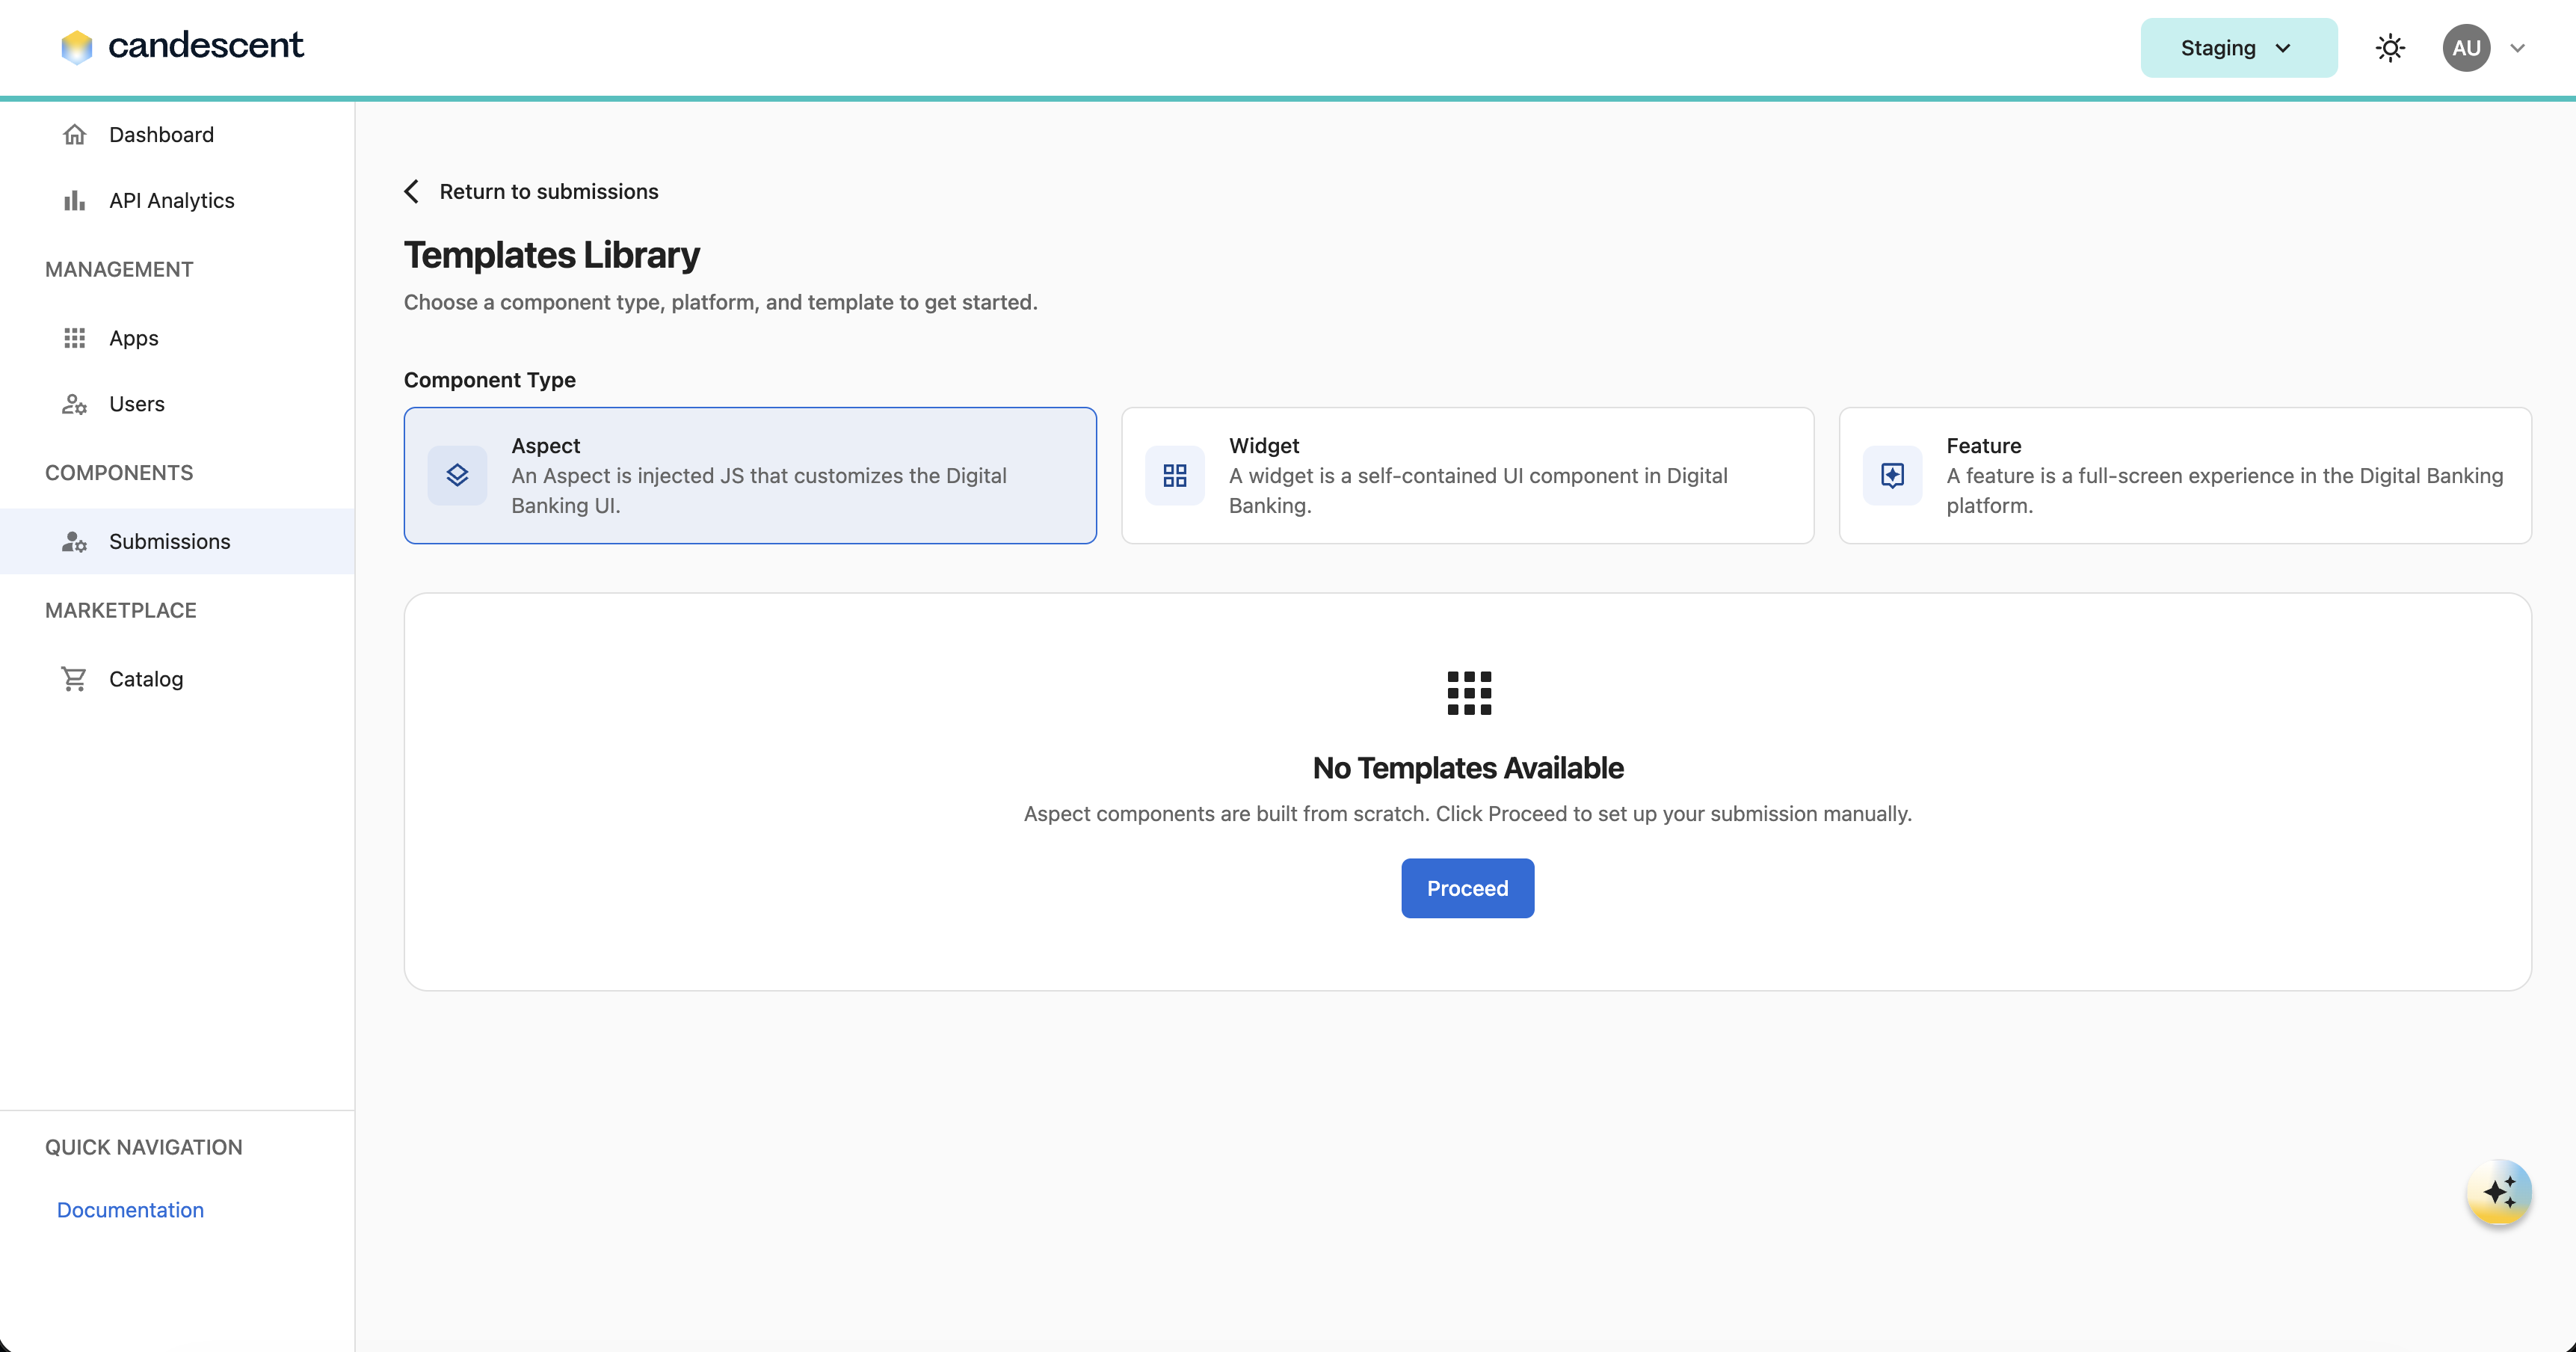
If your FI is already onboarded, click New Submission, then choose the component type from the available cards.
For Aspect, Widget, and Feature submissions, metadata is automatically populated after the PR is created in the private repository.
4.1 Aspect
- Because no templates are currently available for Aspects, click Proceed.
-
Select a platform:
-
Provide code:
- Enter JavaScript code directly in the text box, or
- Select an existing GitHub PR from the dropdown (if one already exists).
-
Enter component details (for example, component name and description).
For more information, visit Aspects.
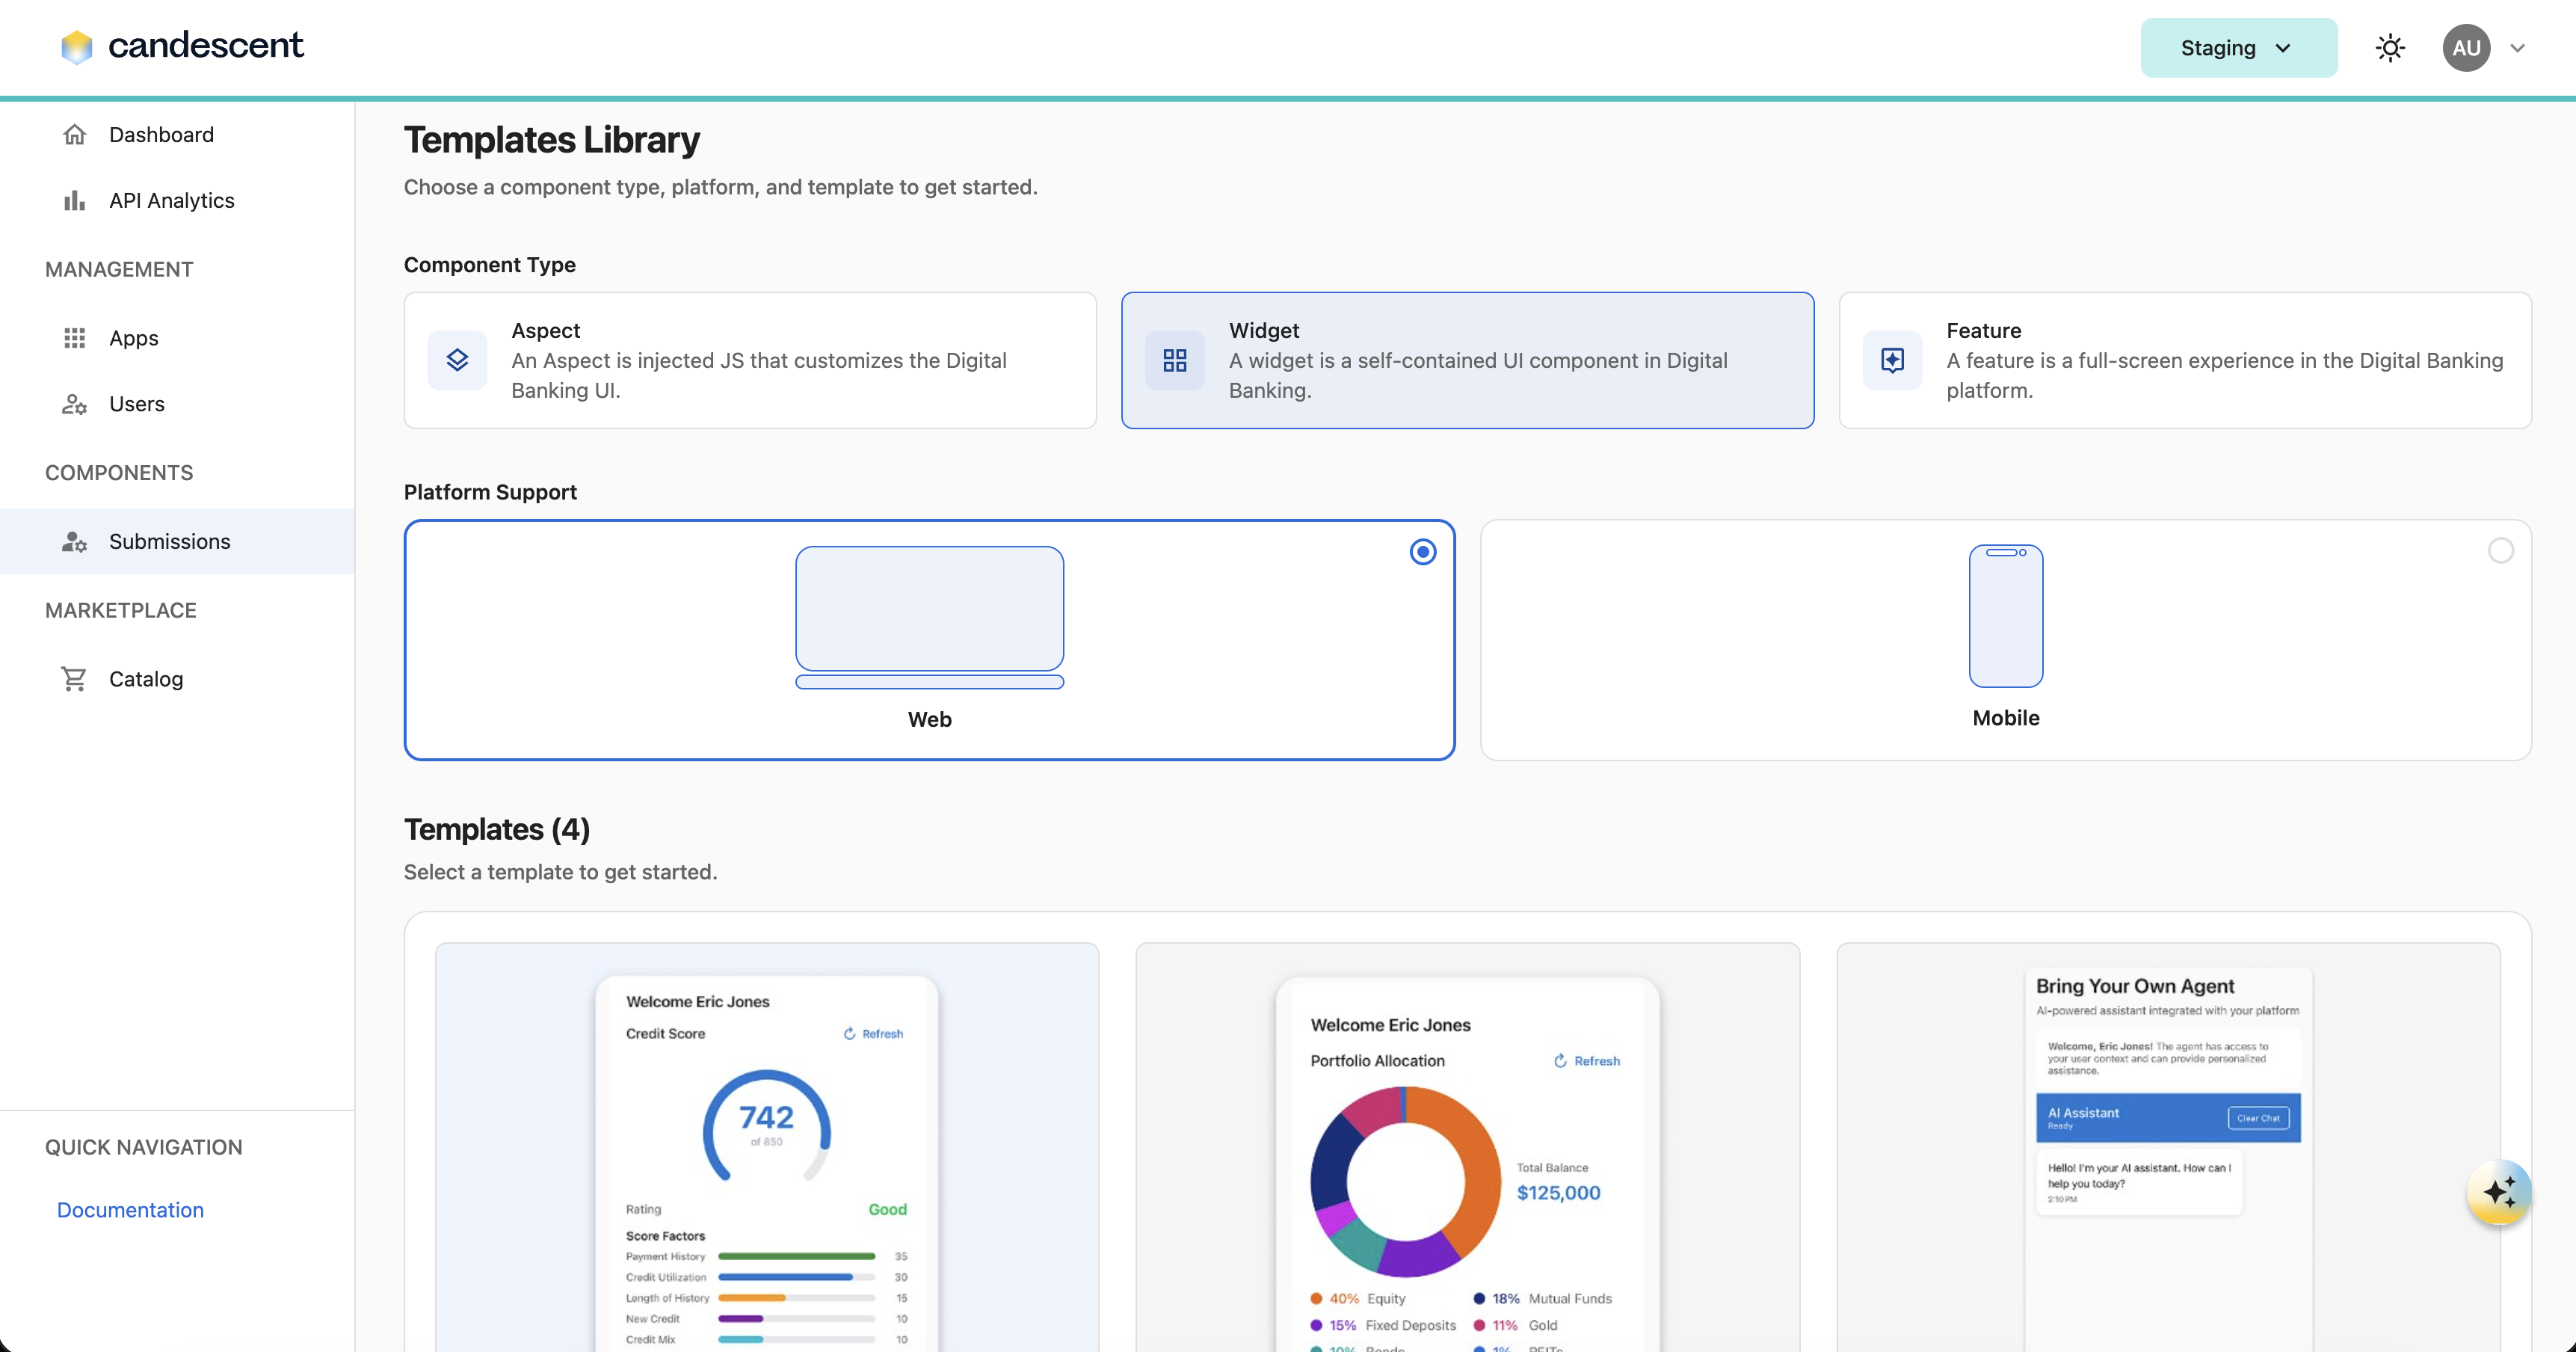
4.2 Widget
-
Select a template:
- Choose a template that best matches your use case and serves as a starting point for building your component.
- Each template includes pre-built scaffolding and follows platform standards, which helps accelerate development and reduce setup effort.
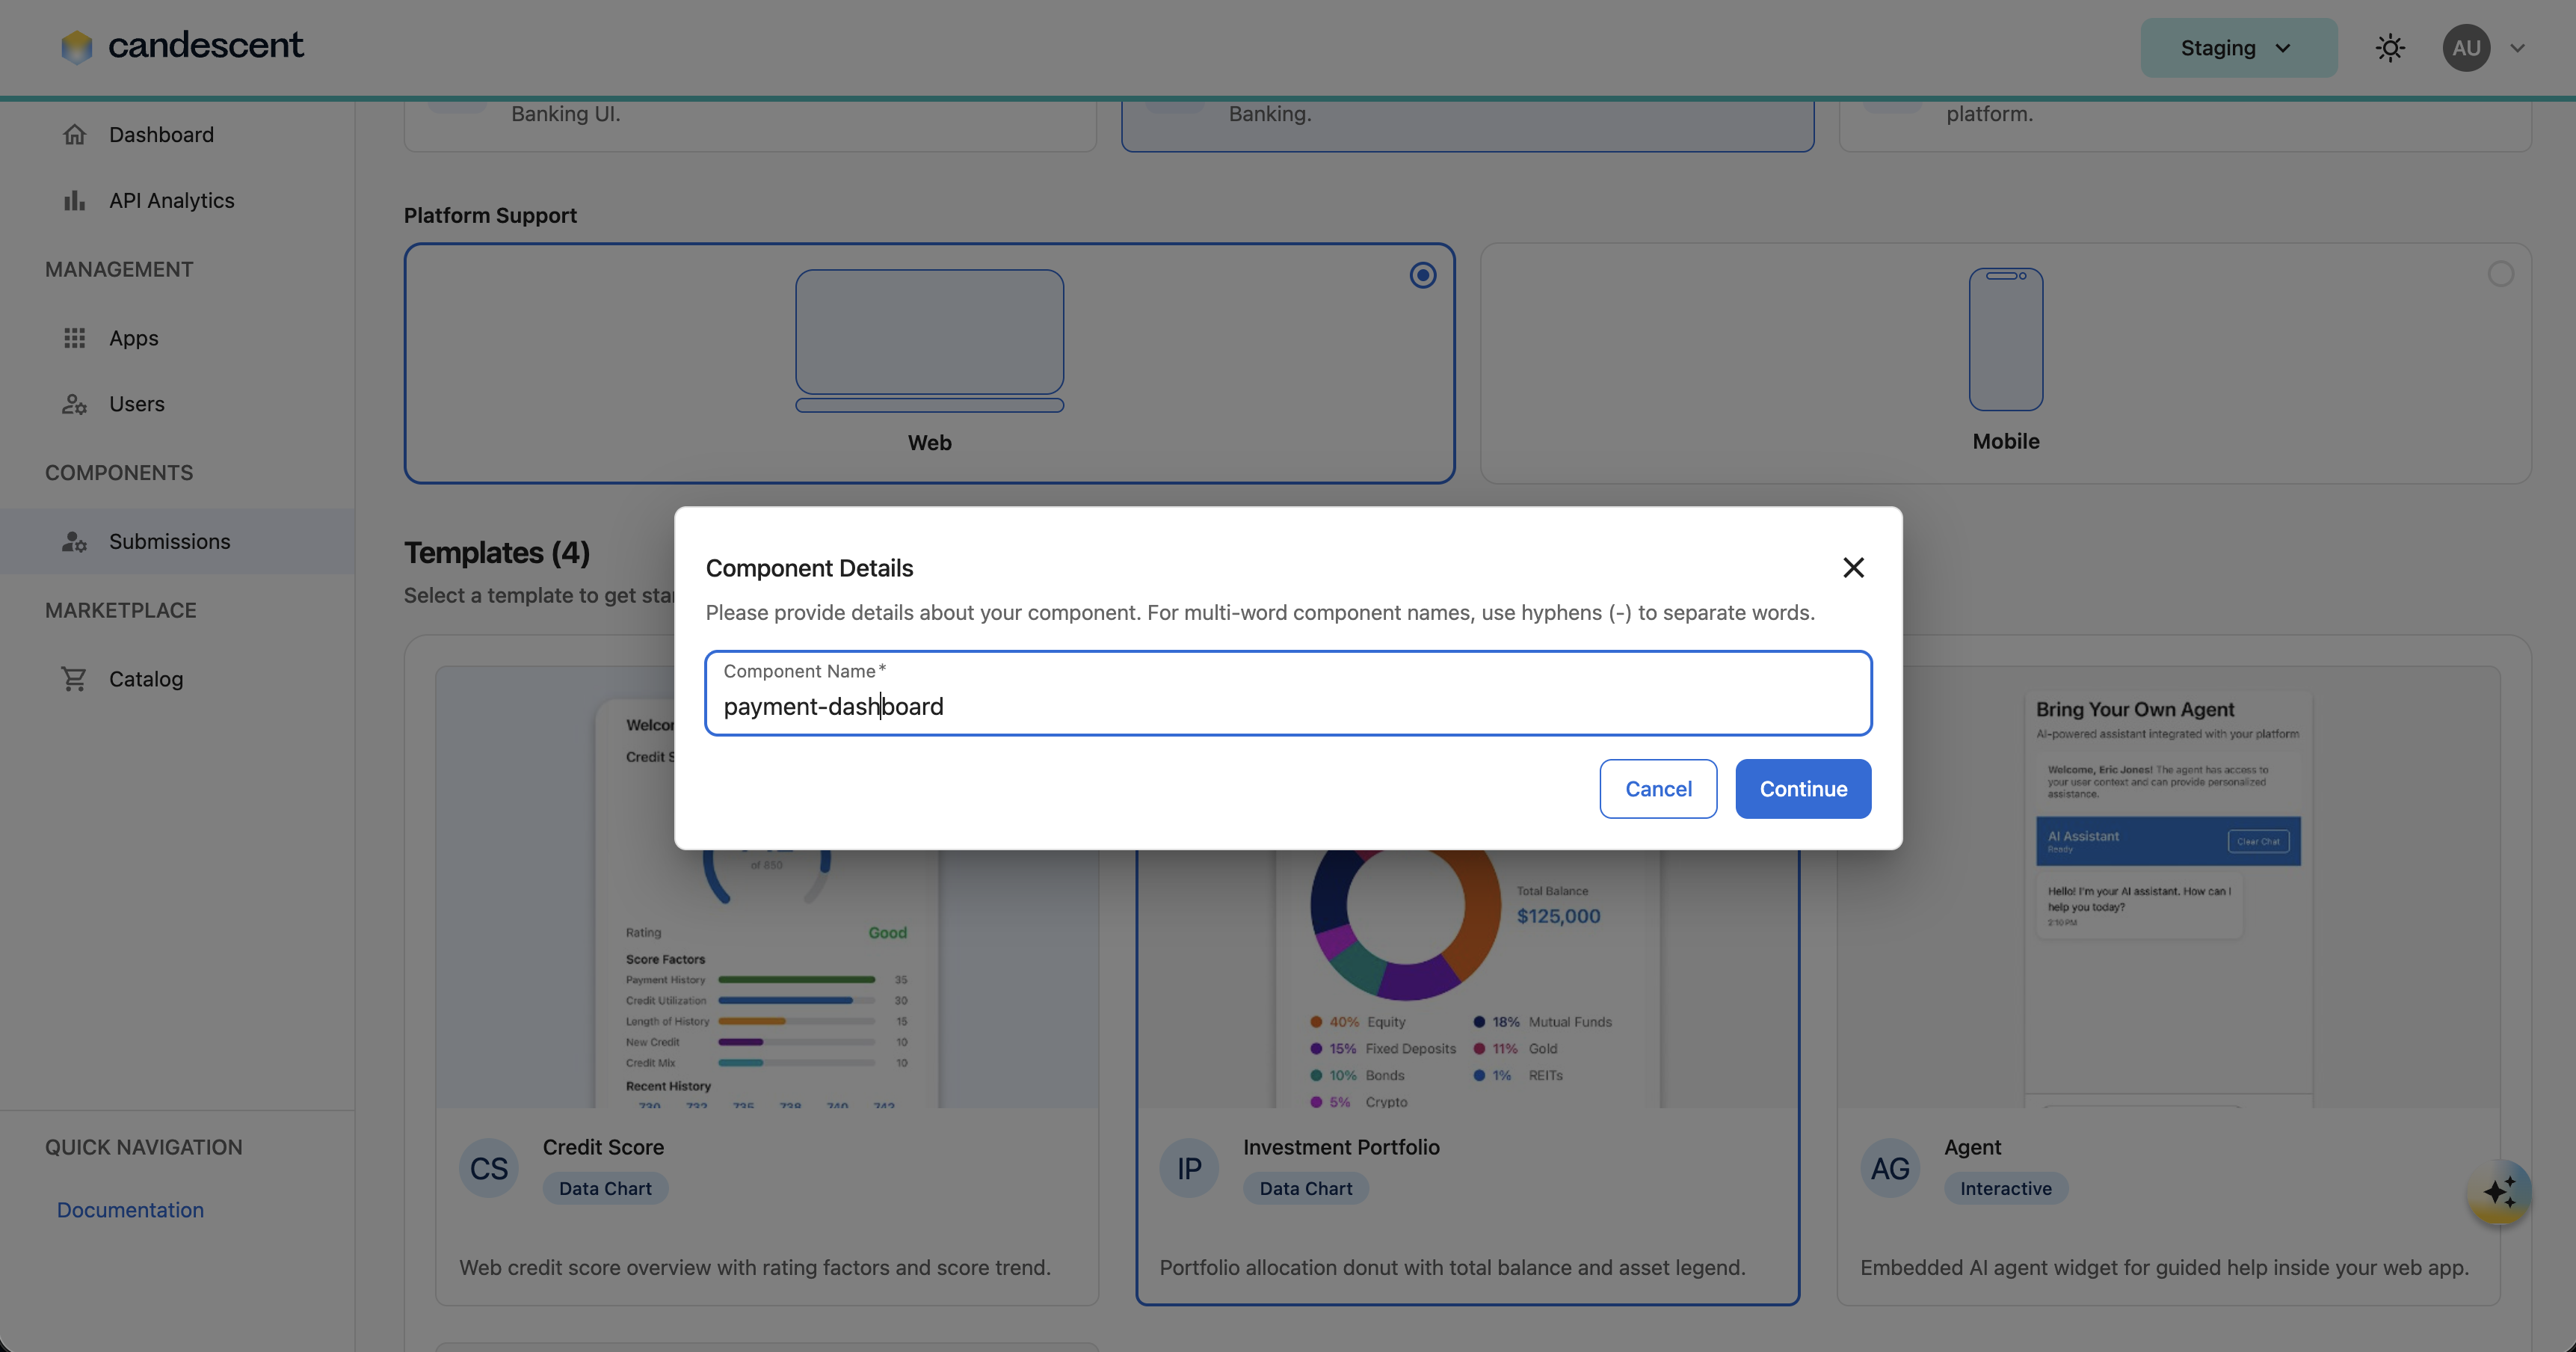
-
Enter component details (for example, component name).
For more information, visit Widgets.
4.3 Feature
- Select a template:
- Choose a template that best matches your use case and serves as a starting point for building your component.
- Each template includes pre-built scaffolding and follows platform standards, which helps accelerate development and reduce setup effort.
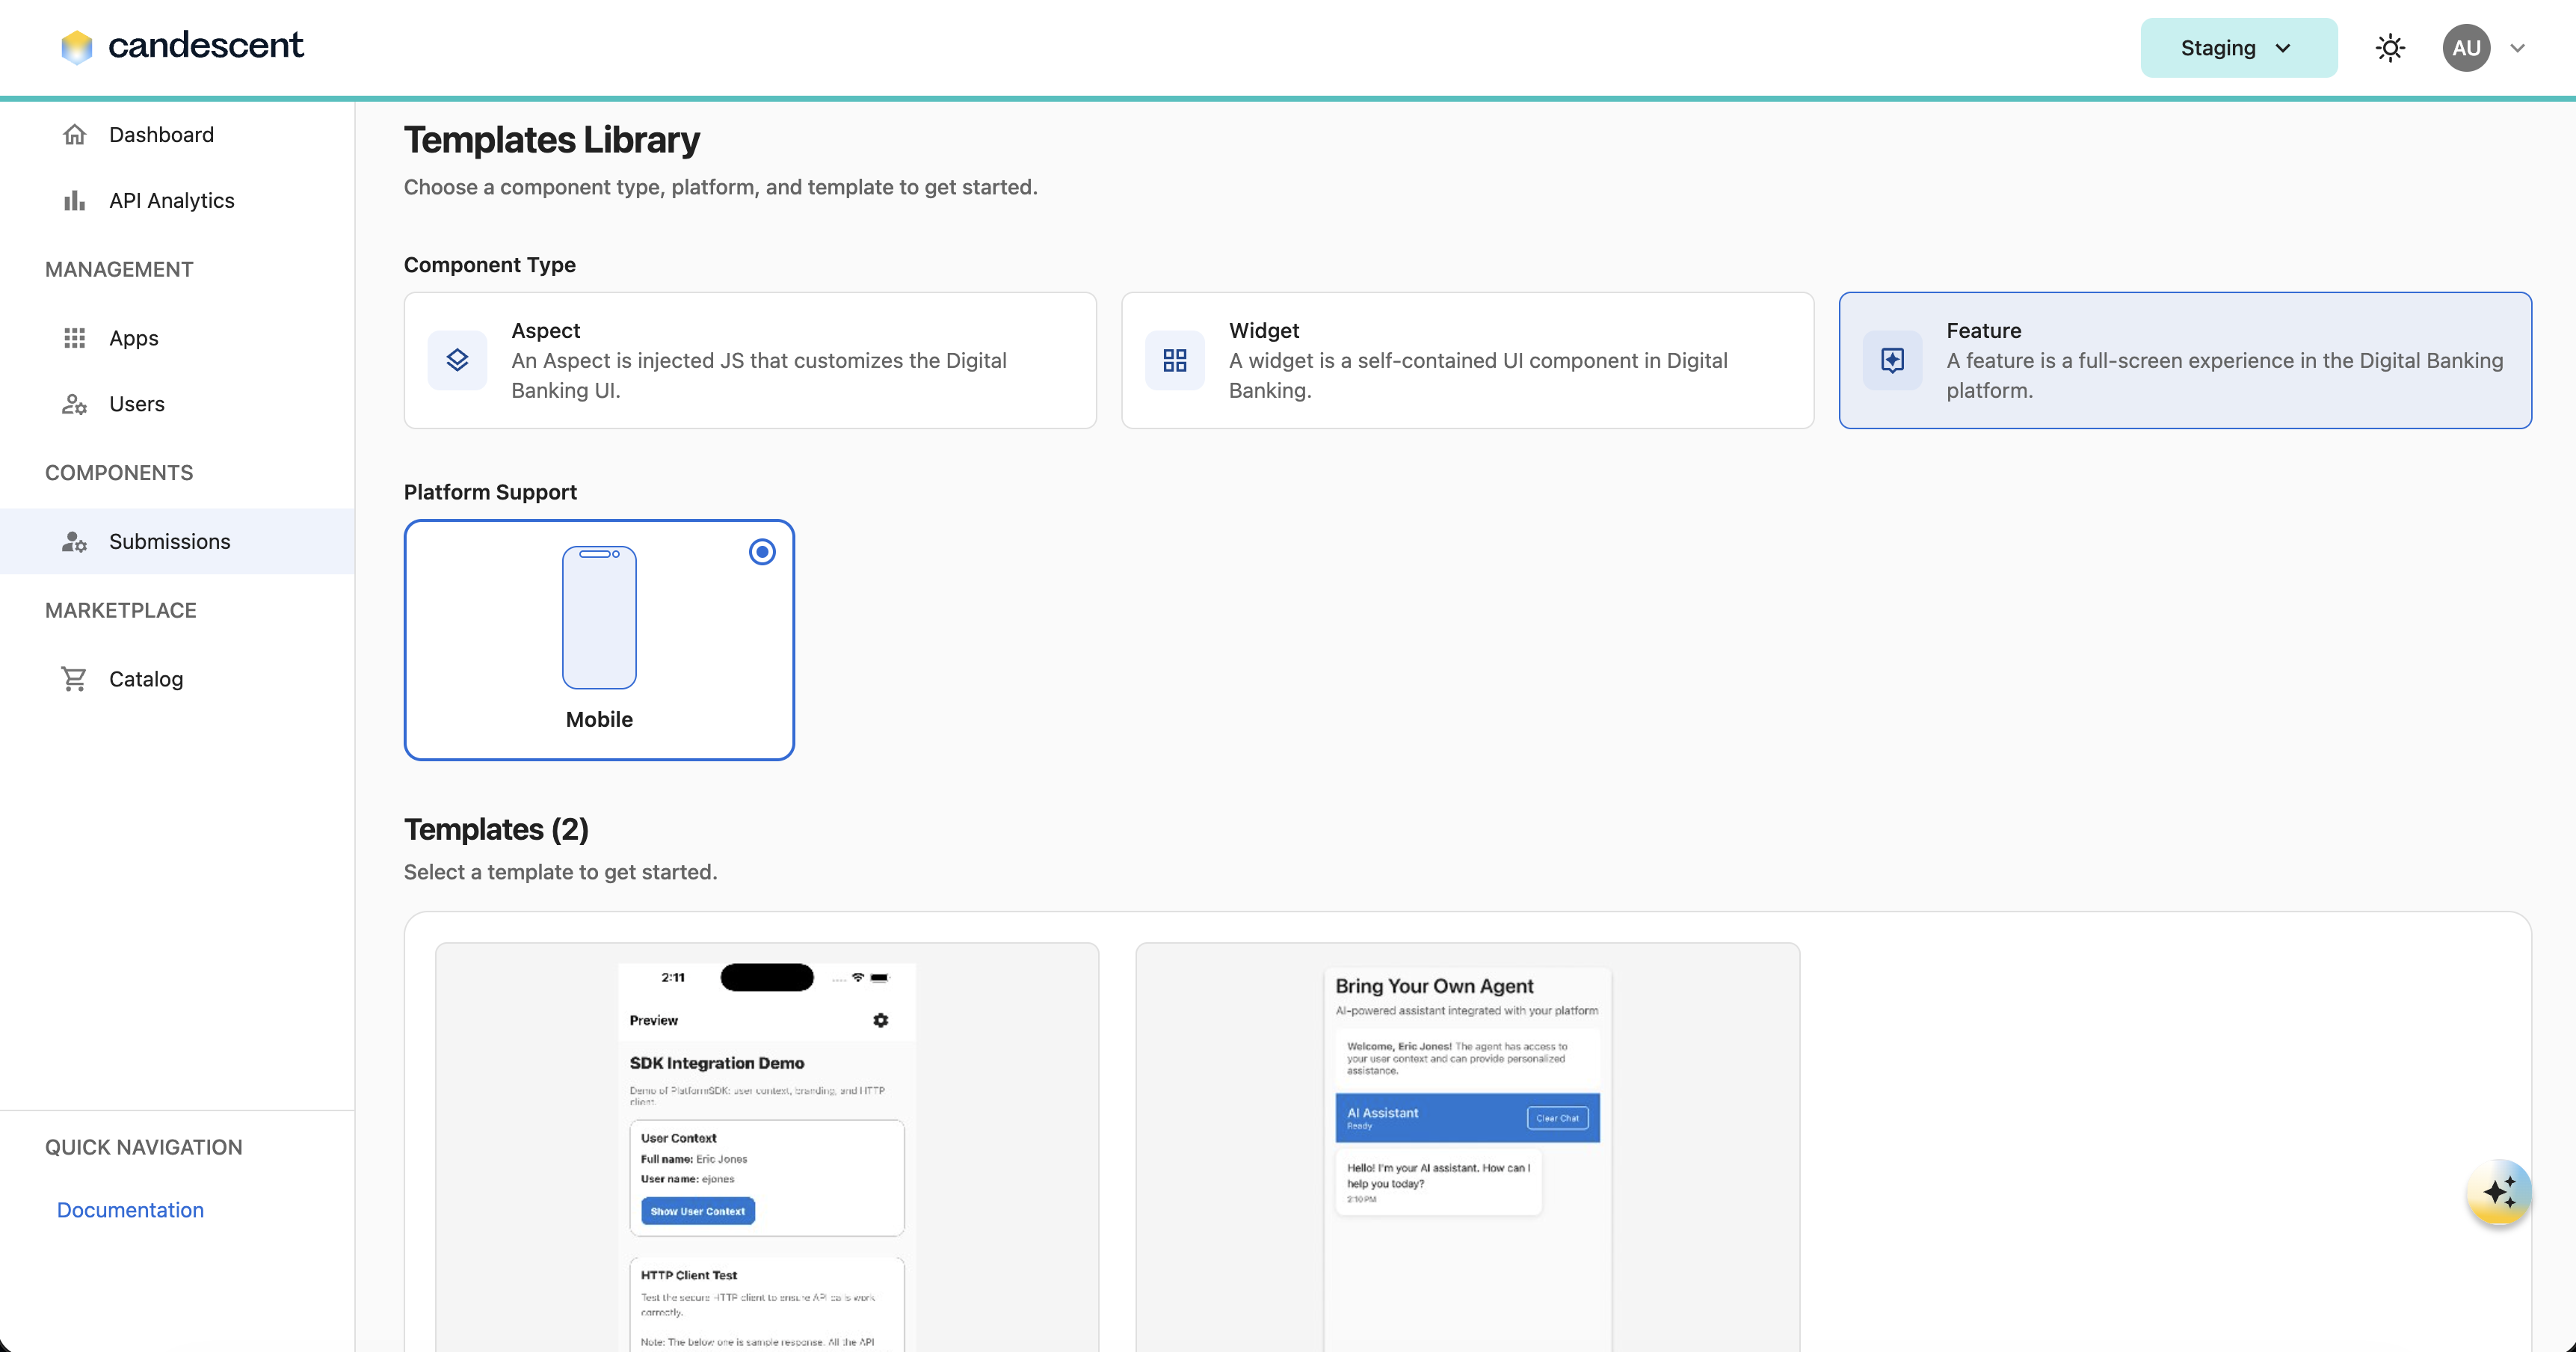
Currently, feature submission is only supported for the mobile platform.
- Enter component details (for example, component name).
For more information, visit Features.
5. Submission Dashboard
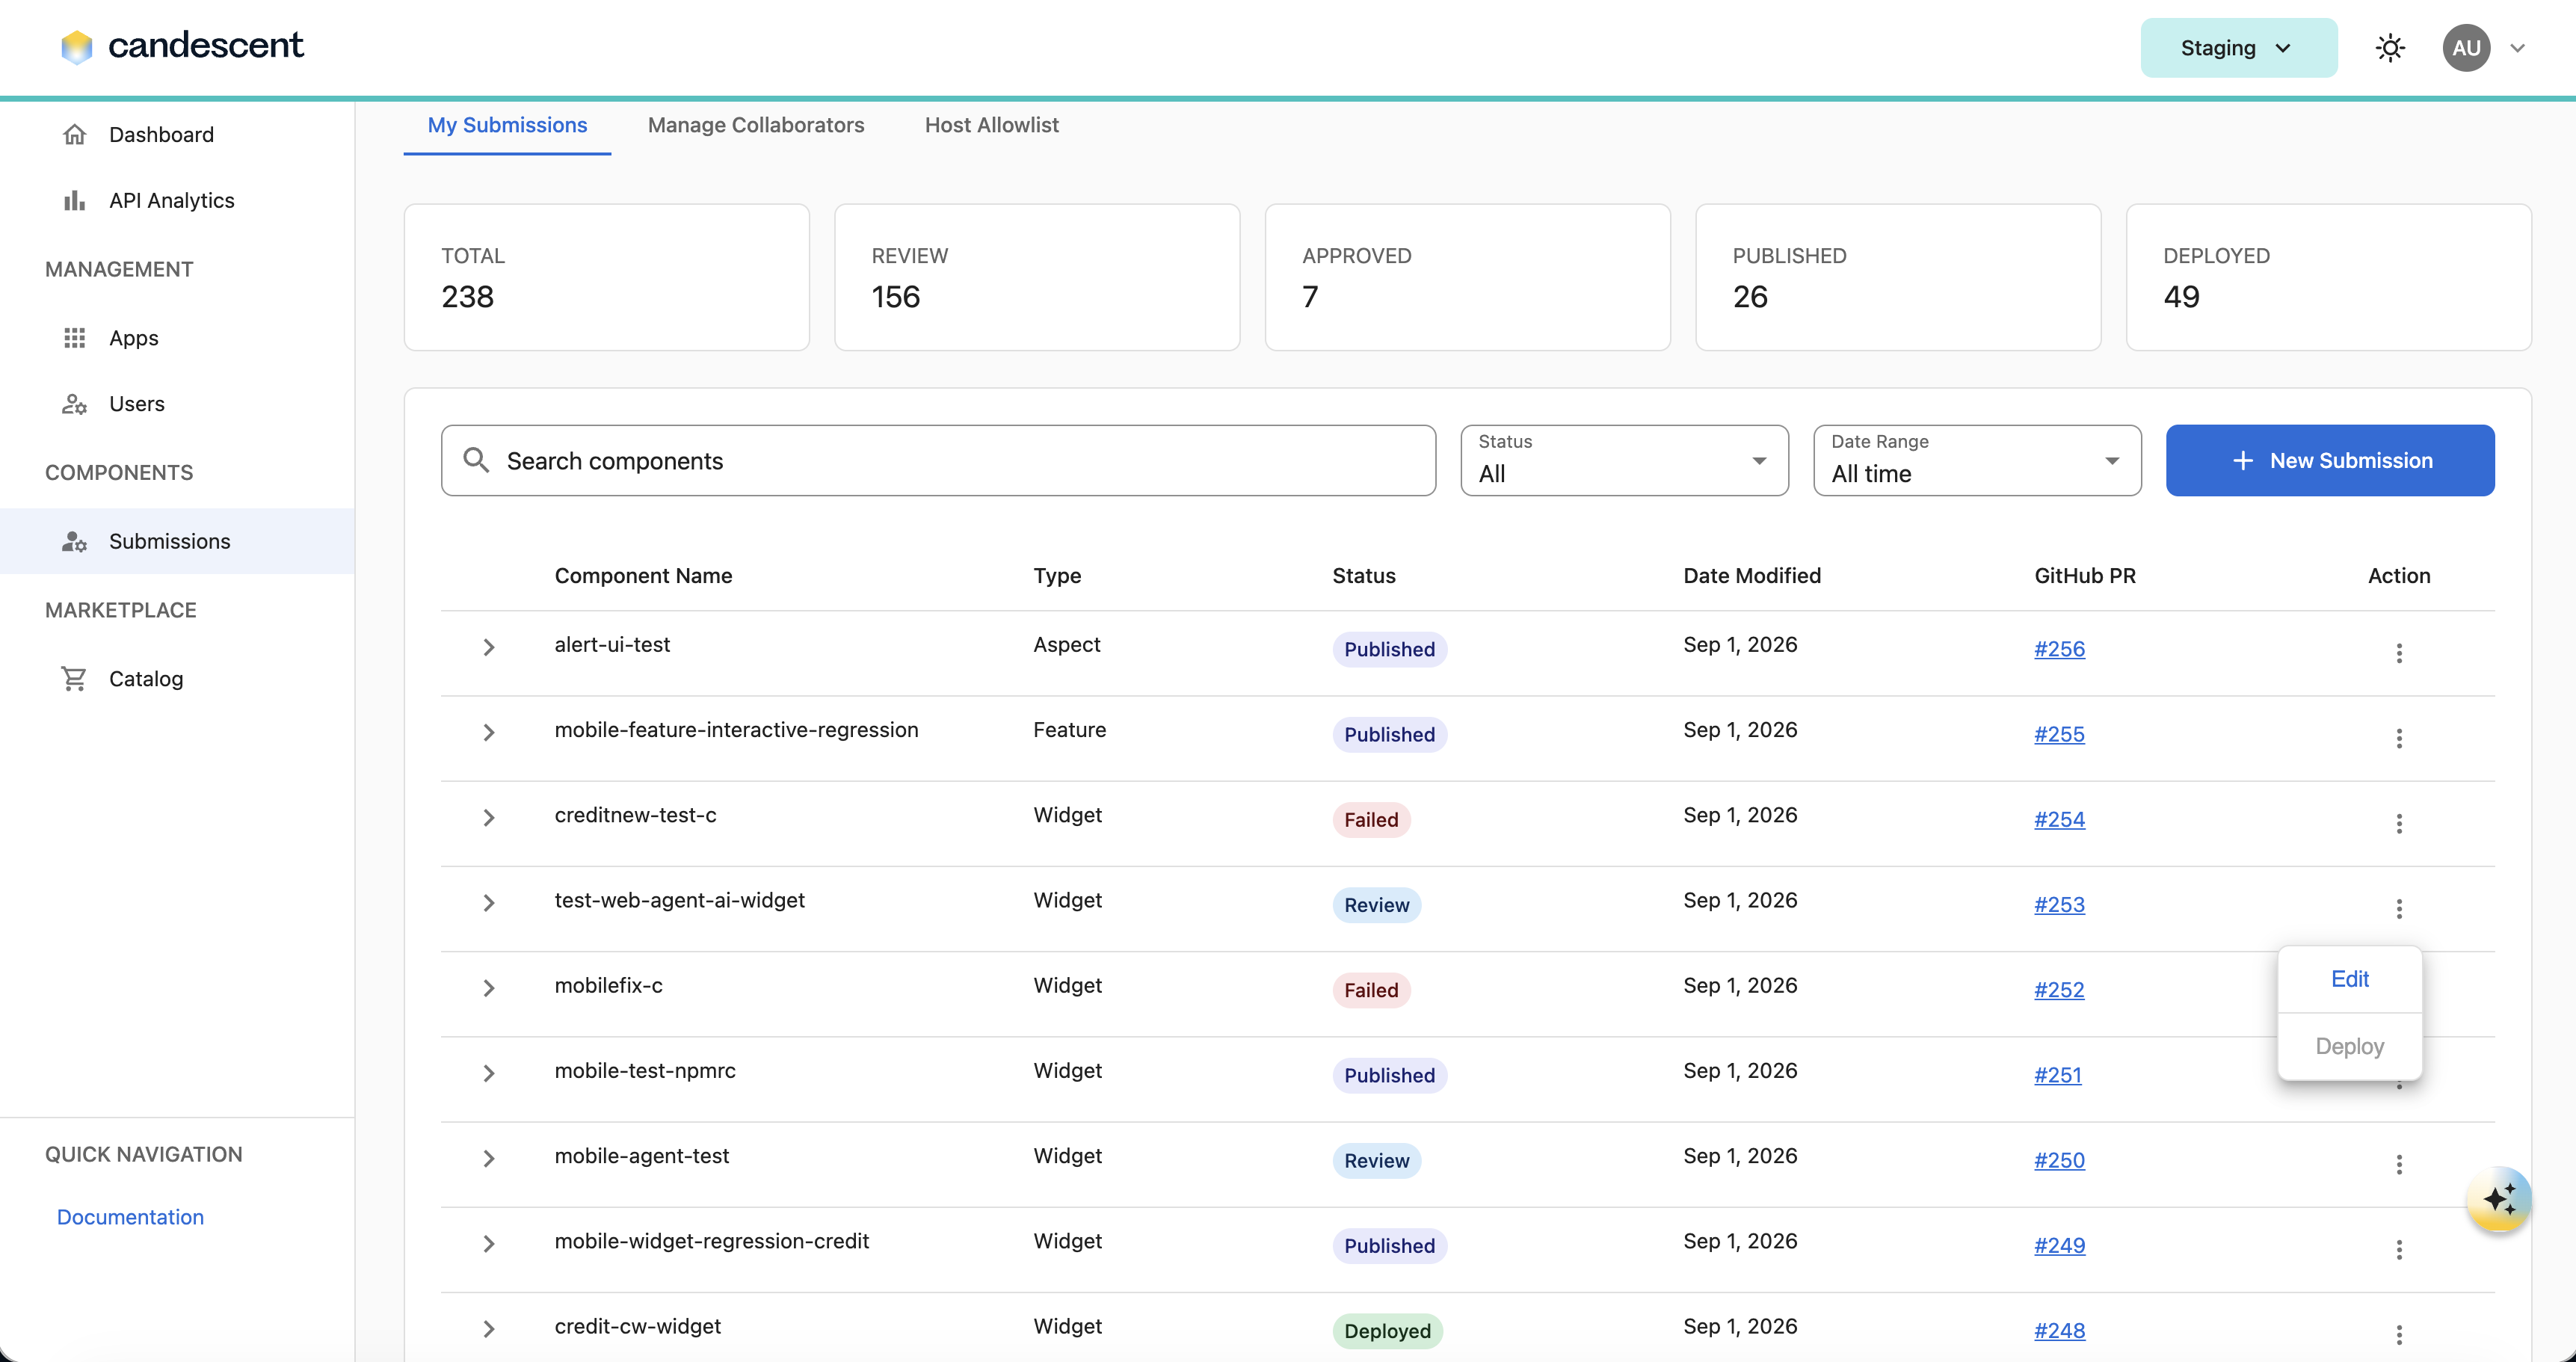
After submission (or for already onboarded FIs), you see the Submission Dashboard.
5.1 Dashboard Features
- View all submissions.
- Search by component name.
- Filter by:
- Status
- Timeline
- Click a component to view its details.
5.2 Component Details View
The following timeline stages are displayed:
| Stage | Description |
|---|---|
| In Review | Submission created. Security scans are in progress, and the submission is under review. |
| Engineering Validation | Code is being reviewed by the engineering team. |
| Security Assessment | Security validations are in progress or completed. |
| PR Merged | The pull request has been successfully merged. |
| Deployed to Environment | The component has been successfully deployed to the target environment. |
You can also:
- View GitHub reviewer comments within the UI.
- Click Read More to navigate to GitHub.
- Click GitHub links to open the PR(s) directly.
5.3 Editing Metadata and Deployment
- You can update a submission's metadata before merging the PR by selecting Edit from the submission's three-dot menu.
- After the component status is Published, you can deploy it to the target environment by selecting Deploy from the three-dot menu.
6. Environment Switcher and Deployment
6.1 Environment Selection
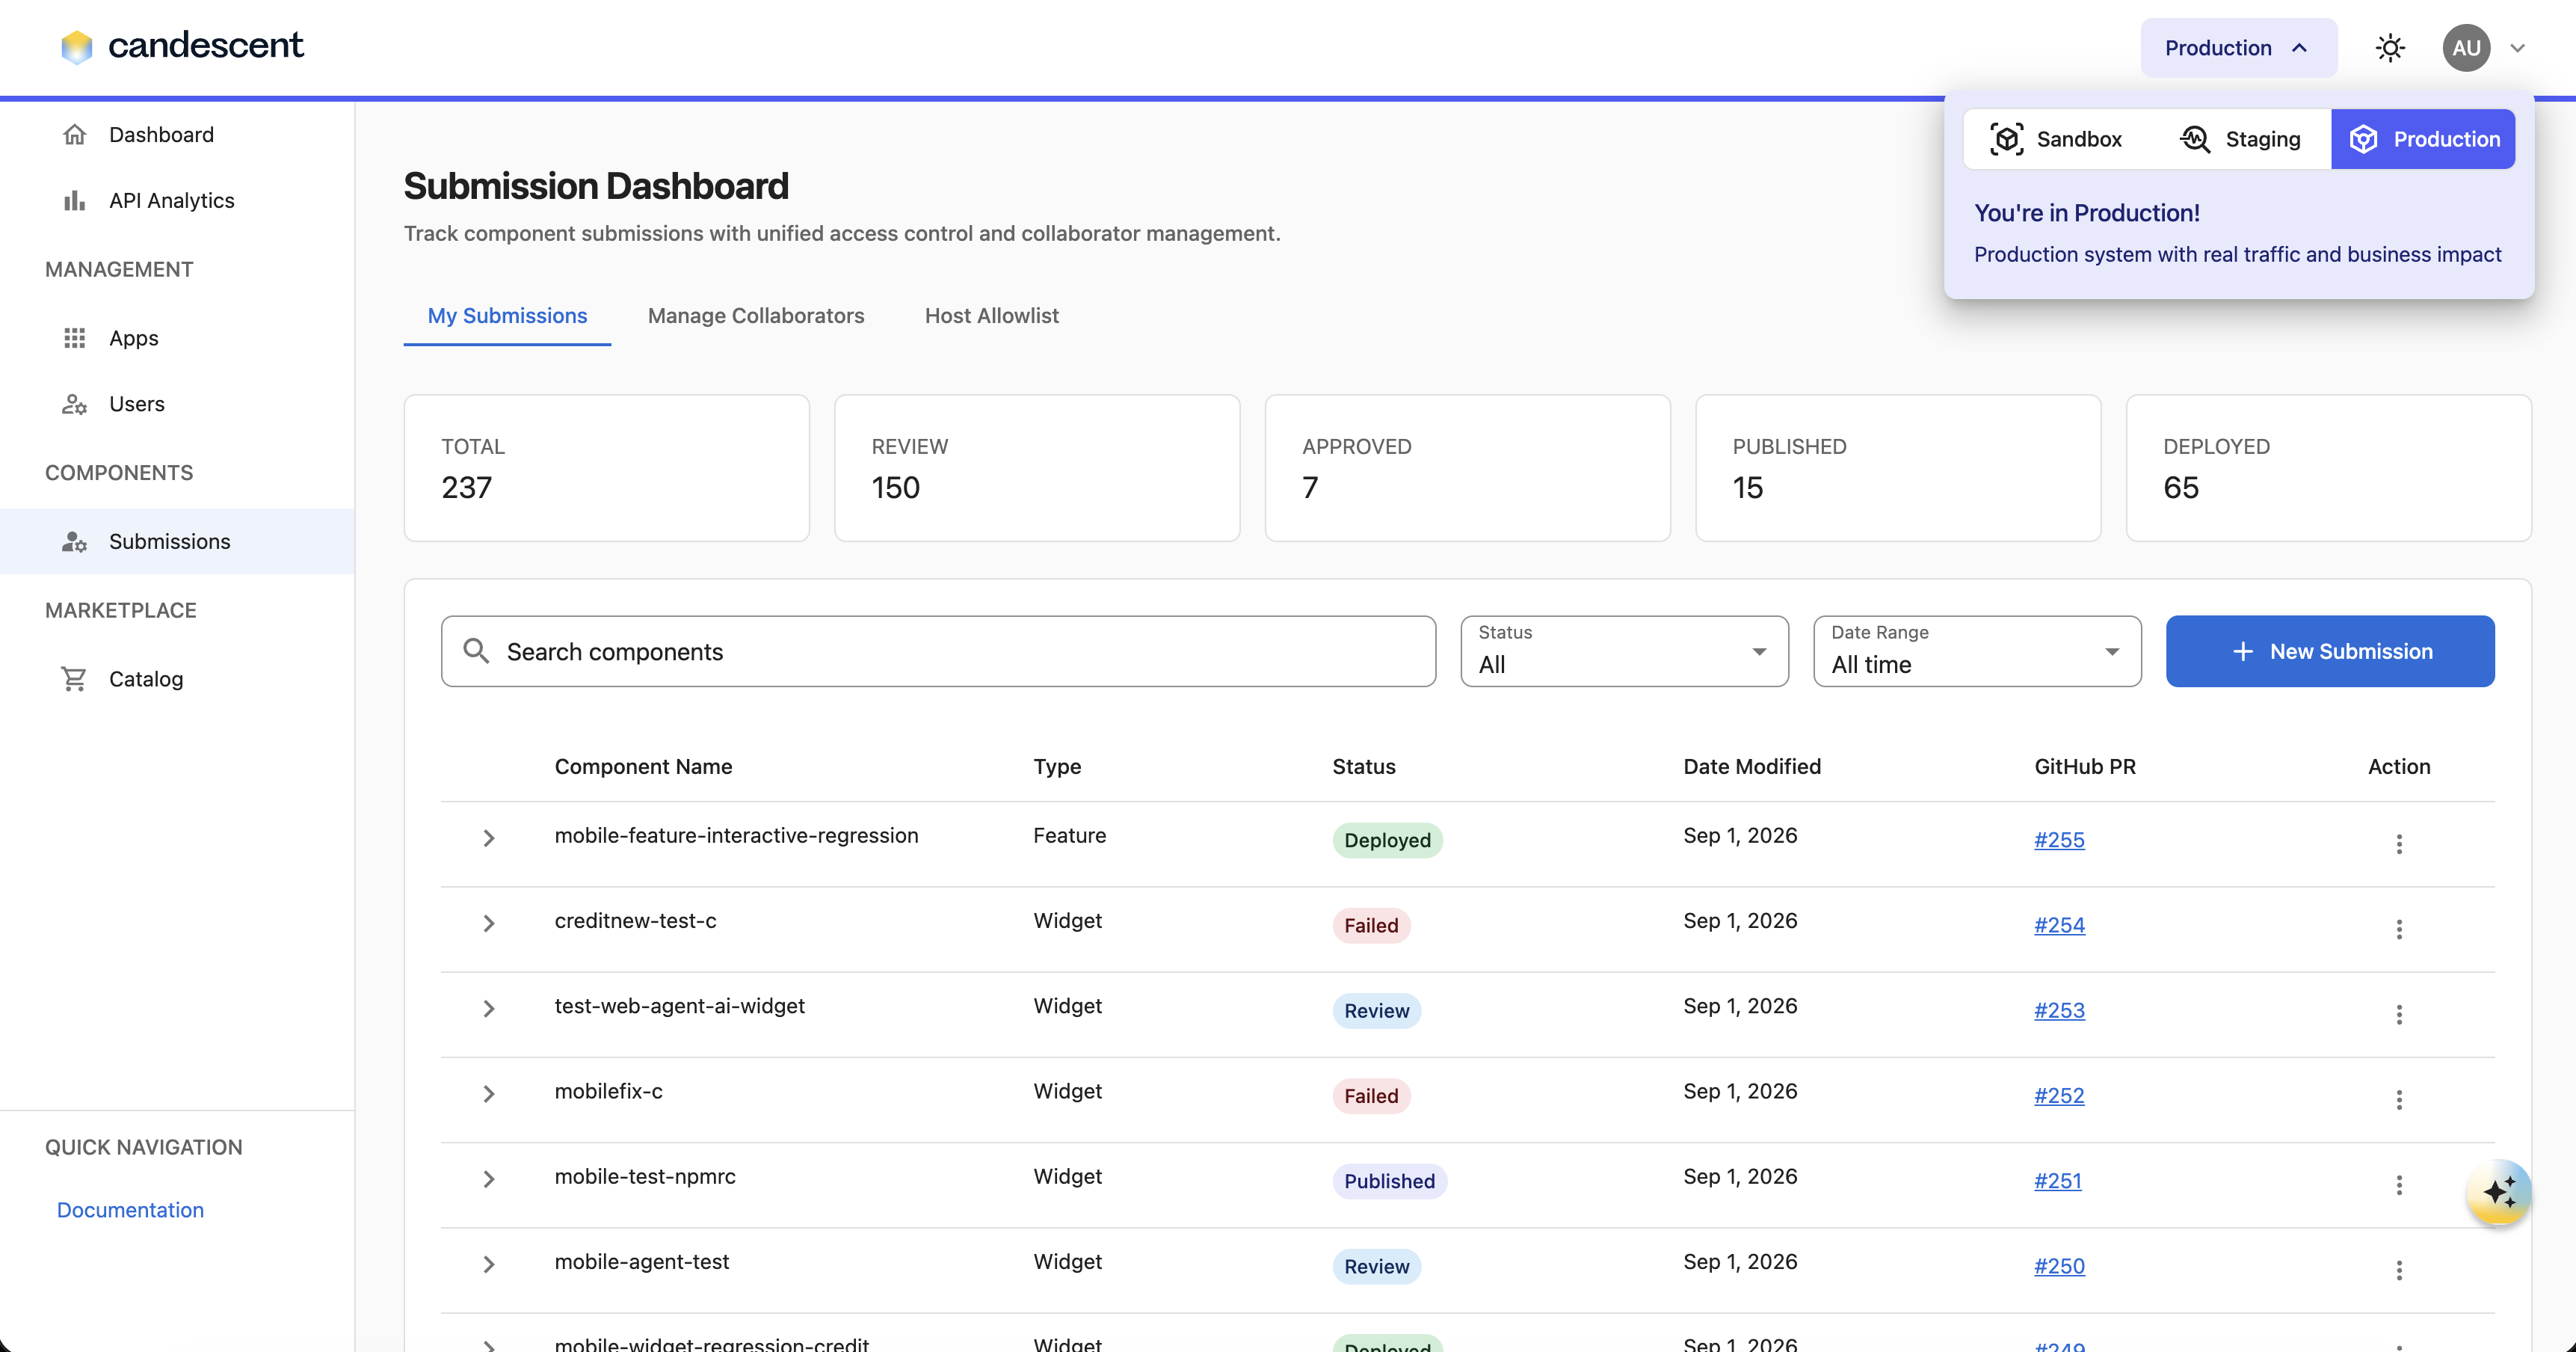
The Developer Console supports multiple environments, allowing you to switch between Sandbox, Staging, and Production without leaving the application.
To switch environments:
- Click the Environment Switcher in the header.
- Select the desired environment:
- Sandbox
- Staging
- Production
- The Developer Console automatically refreshes and loads data for the selected environment.
This ensures:
- You always work within the correct environment.
- Environment-specific resources are displayed automatically.
- Navigation remains consistent across all environments.
Environment availability is based on user permissions. You can only switch to environments you have access to.
6.2 Environment-Based Resource Availability
Some resources and tools may vary depending on the selected environment.
When an environment is selected:
- Available resources are loaded automatically.
- Environment-specific tools are displayed when applicable.
This ensures:
- A consistent user experience across all environments.
- Access to the appropriate tools for development, testing, and production activities.
- Proper enforcement of environment-specific permissions and controls.
Resource visibility and access are governed by user roles and environment permissions.
7. Role-Based Access in Developer Console and Repository Permissions
7.1 Roles with Access to the Submissions Tab
| Role | Access |
|---|---|
| Admin | Full access |
| Developer | Submit and view |
| Spectator | No access |
7.2 GitHub Team Requirements
Even if a user is an Admin or Developer of the Developer Console:
- They must be part of the FI GitHub team.
- If they are not part of the GitHub team:
- They can only view the dashboard.
- The New Submission button is disabled.
- They cannot view PR details or create submissions.
7.3 Restrictions
- Users cannot access other FI repositories.
- Each user has access only to their own FI private repository.
8. Manage Collaborators
Only Admin users can manage collaborators (add and remove collaborators).
8.1 Admin Capabilities
In the Manage Collaborators tab, Admins can:
- Add users by entering an email address.
- Remove collaborators.
- View details:
- FI ID
- FI Name
- GitHub Repo URL
- Action column
8.2 Developer Restrictions
- Developers cannot add or remove collaborators.
- The Manage button is disabled for Developers.
8.3 Adding a Collaborator
When an Admin adds a user:
- The user must already exist in User Management (with an Admin or Developer role).
- The user receives a GitHub invitation email.
- After accepting the invitation, the user gains access to the FI private repository.
8.4 Domain Allowlist
The Domain Allowlist feature enables FI administrators to grant access to private GitHub repositories for users from approved domains.
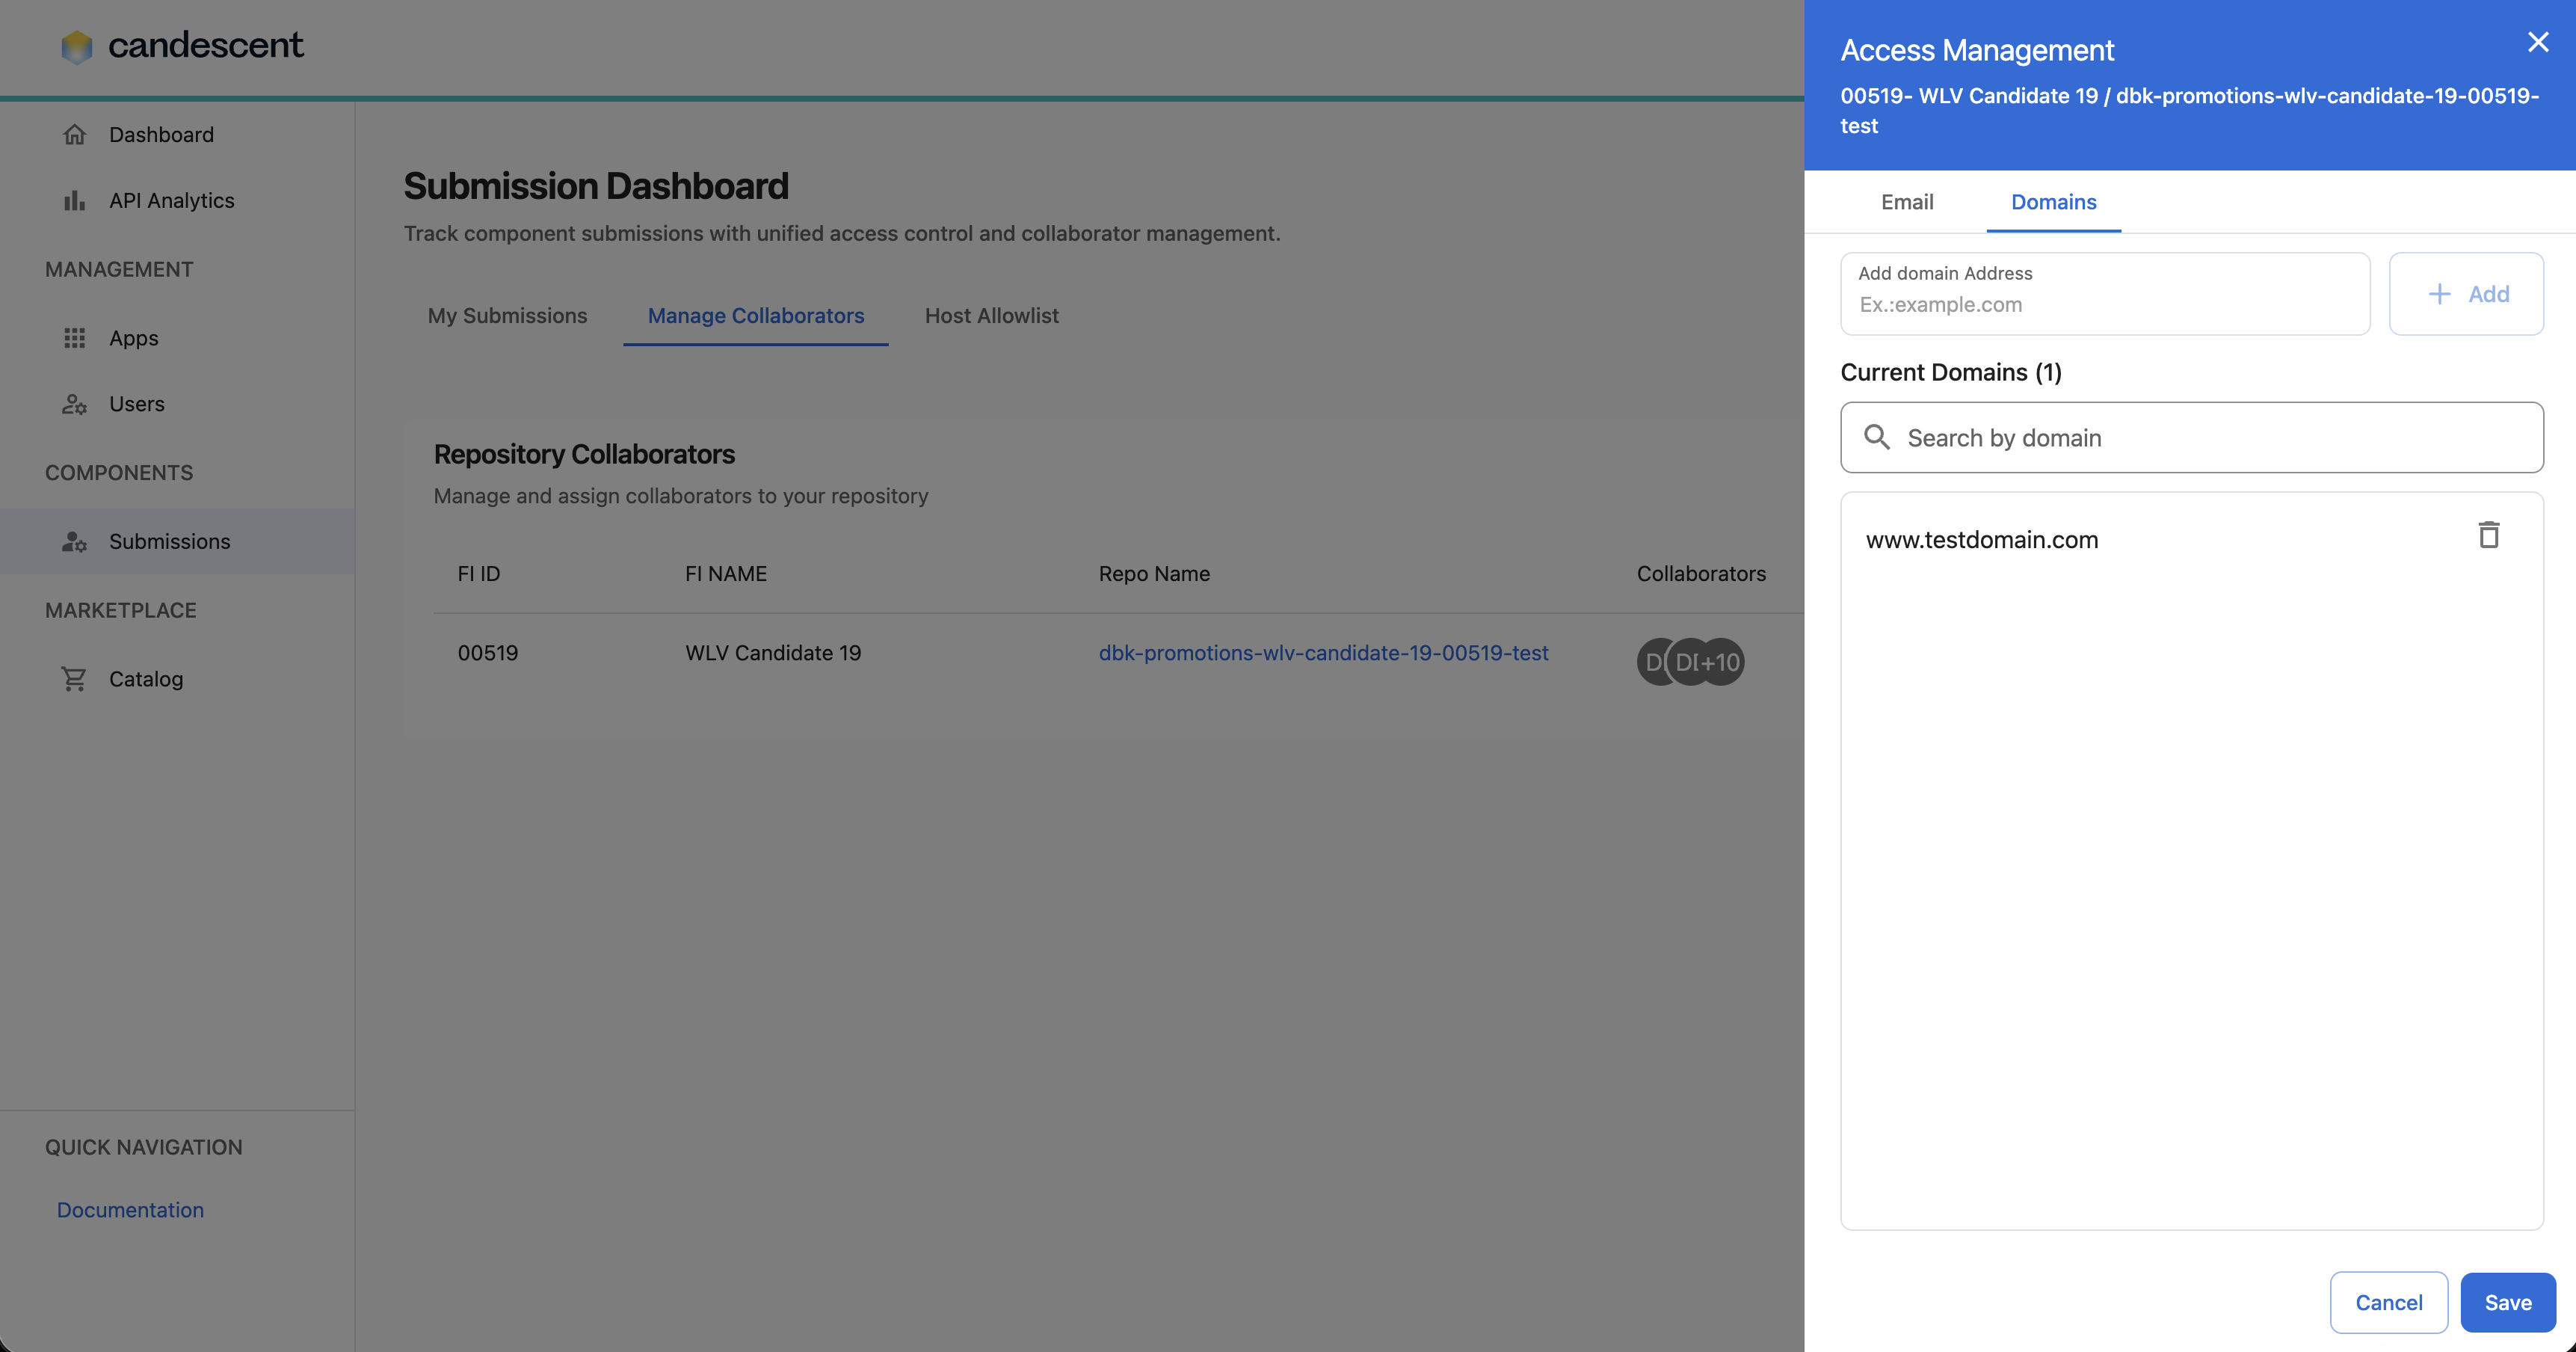
To add a domain to the allowlist:
- Navigate to Submissions and select Manage Collaborators.
- Click Manage.
- Open the Domains tab.
- Enter the domain you want to allow.
- Click Save to submit the request.
- The request is routed to a Super Admin for review and approval.
- After approval, the domain appears in the Current Domains table.
- Users from the approved domain can then access the associated private GitHub repository.
Domain allowlist requests may take 3–5 business days to be approved and synchronized with GitHub.
9. Host Allowlist
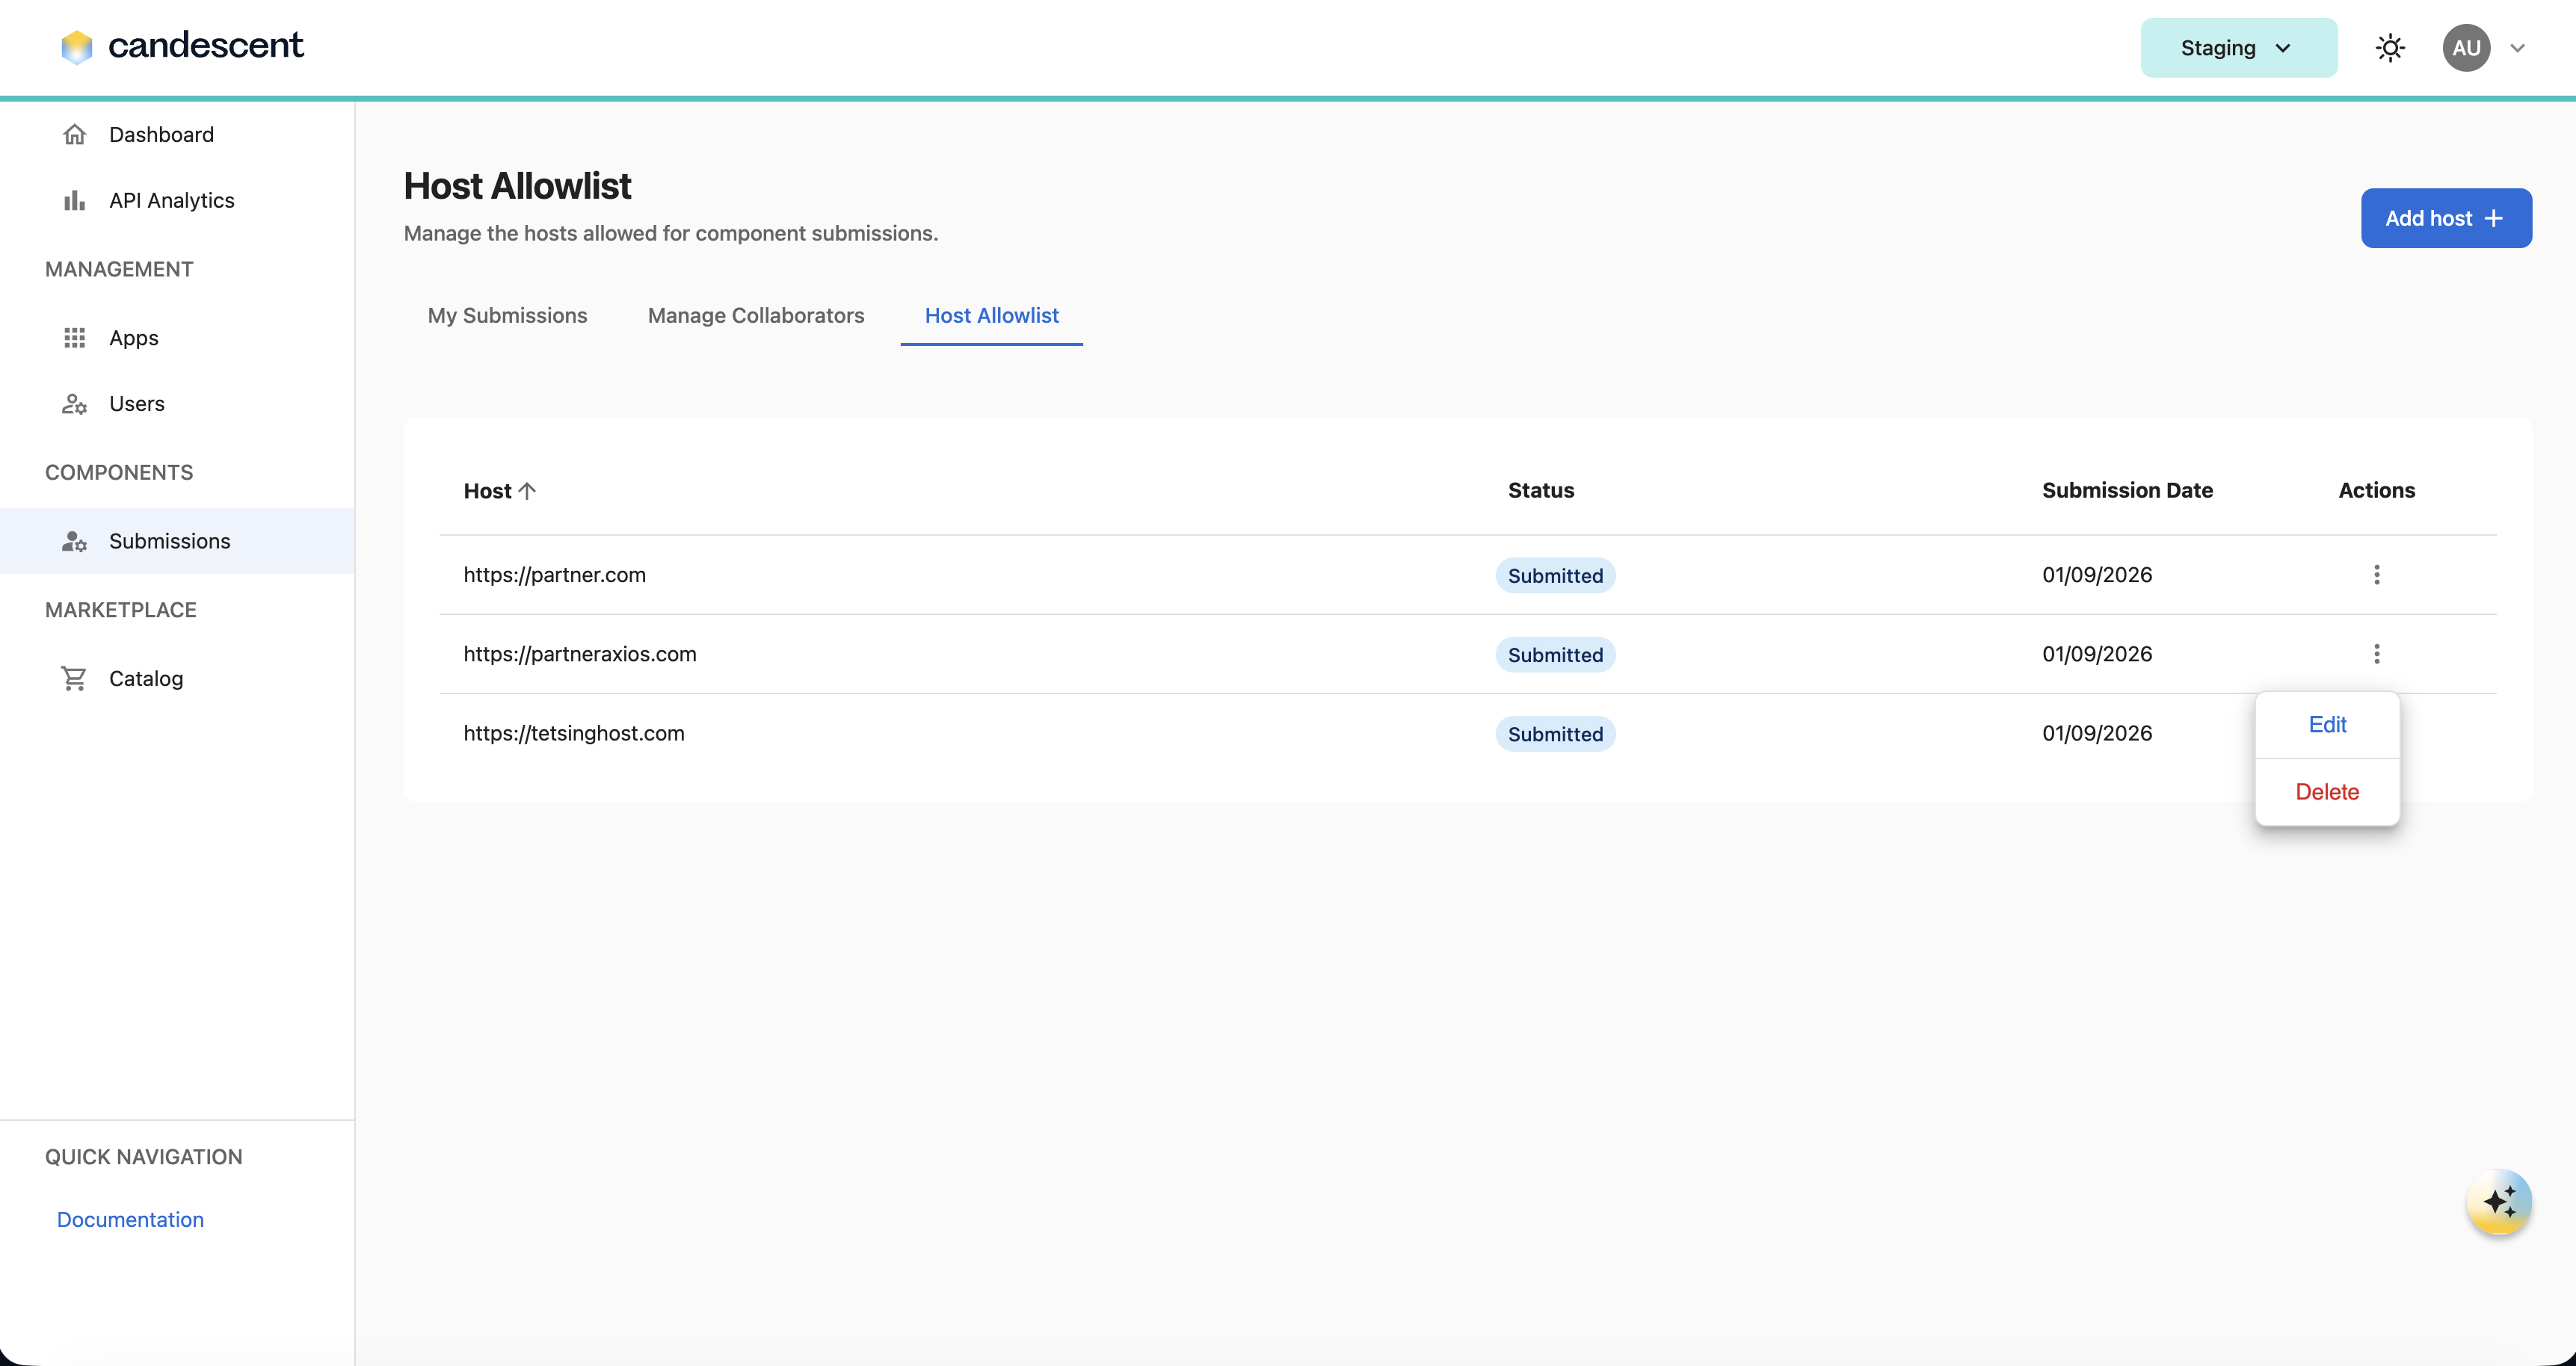
The Host Allowlist enables Financial Institutions (FIs) to manage trusted external hosts that can be used by components within the Developer Console. This governance capability ensures that only approved hosts are available during component submissions, helping organizations maintain security, compliance, and operational control.
9.1 Add a Host
To request a new host:
- Navigate to Submissions → Host Allowlist.
- Click Add Host.
- Enter the required information:
- Host URL
- Click Submit.
Once submitted, the request is routed to the Super Admin for review.
9.2 Request Lifecycle
| Status | Description |
|---|---|
| Submitted | The host request has been submitted by an FI user and is awaiting review by the Super Admin. |
| Approved | The Super Admin has approved the request. The host is automatically added to the Host Allowlist and becomes available for Widget, Aspect, and Feature submissions. |
| Declined | The Super Admin has declined the request. The host is not added to the Host Allowlist and cannot be used for component submissions. |
10. PR Workflows and Approvals
10.1 Workflow Stages
Once a submission is created, the workflow stages are:
| Stage | Description |
|---|---|
| Review | PR created, scanning initiated, or updated with reviewer comments. |
| Revisions | Changes requested by reviewers; update the PR and resubmit. |
| Approved | All scans passed and approvals from Engineering and Security completed. |
| Published | The component PR is merged. |
| Deployed | The component is deployed to the target environment. |
| Failed | Submission failed due to scanning or publishing issues. |
| Closed | PR closed without merging; submission no longer active. |
10.2 User Capabilities During Review
- Users can edit the code in the GitHub PR.
- Users can merge the PR only after obtaining engineering and security team approvals.
- Users cannot assign reviewers.
11. Email Notifications
Users receive email notifications for:
- PR creation
- Security scanning results
- Engineering validation updates
- Security assessment updates
- Reviewer comments
- Approvals
- PR merged
12. Publishing and Deployment to Experience Groups
Once a component is:
- Approved by the engineering team
- Approved by the security team
Then:
- You can publish the component or merge the PR.
- The status updates to Published.
- After the component reaches Published status, use the Deploy button to release it to the Experience Group tied to your active environment.
13. Already Onboarded FI Scenario
If the FI is already onboarded and has submitted a component before:
- After login, you can view the Submission Dashboard.
- All submissions for the FI (across users) are visible.
14. Security and Isolation
- Each FI has a dedicated private repository.
- No cross-FI visibility.
- Role-based UI restrictions are enforced.
15. Troubleshooting Submission Failures
If a submission fails, check the GitHub Action logs for the specific cause of the failure. The logs indicate whether the issue is a configuration error, a validation failure, or an Aspect limit violation.
15.1 Aspect Limits
Each Experience Group has a defined limit on the number of Aspects it can contain. If a submission fails due to a limit violation:
- Remove an existing Aspect that is no longer needed.
- Re-run the GitHub Action job.
- To increase your Aspect allocation, contact your DSM.
16. Additional Support
For questions or issues related to Submissions in the Developer Console, contact security-ops@candescent.com.
Next Steps
To search and discover details around Marketplace Products, visit Marketplace Product Catalog.